Once we identified a few houses we might be interested in, we asked our Realtor if we could visit them.
First we sat together and looked through the pictures, checking the descriptions and the locations on the map. Since location was one of our main criteria, we discarded a bunch of houses that, while in our desired neighbourhoods, were too far from places of interest. Some others look terrible in the pictures; a few were discarded simply because the pictures showed them to be in bad condition, meaning they’d need lots of renovations before being usable.
We divided the remaining houses into “top picks” and a secondary list of “maybe”s which we didn’t outright discard. But we decided to focus first on the top picks.
Depending on how active the market is, some of the houses may be sold before you get a chance to see them. Three of our top picks were in this situation, narrowing down our list.
We send the listings to our realtor who then arranges for the visit which is done in the presence of your realtor; the house may be shown by the current inhabitants or by the selling agent. Having the realtor there was a good advantage because she pointed out many aspects we could have overlooked: potential for expansion, whether the doors/windows look new, any superficial evidence of damage or poor construction, things that may need changing or considering, and so on.
Once you’ve visited a few houses and formed a mental picture of what you liked and disliked about them, you can think about whether any of those are convenient for you. After seeing them, you have all the facts (and the subjective opinion you may have on each of them) and can do an analysis to see if any of those satisfy your criteria. If none do, then just keep waiting! One thing we observed is that new listings pop up almost daily (and the good ones are snapped up quickly), so don’t feel too rushed if you don’t find a house you like among current candidates. The houses you do see will allow you to clarify your needs and desires, so that when the right one comes along, you’ll be ready to move quickly.
We looked at 4 houses:
One had a very nice garden and lots of land and potential, but had a lot of moisture and foundation problems and was really really far.
Another was move-in ready and had a very convenient layout, as well as a dog-friendly and big garden, but it was at the very top of our budget plus was quite far from most of the amenities we like.
A third one was beautifully renovated and move-in ready, and was quite close to transit and favoured amenities, but it had no room for growth as it had only a small front yard.
A fourth one was relatively well-kept and renovated, close to amenities and transit and while it had only a front yard, it was quite large and left a bit more room for growth. But the spaces were very untraditional and tailored to the specific needs of the inhabitants (which didn’t necessarily match our needs).
As you can see, all houses have their pros and cons. If you find one that has no cons and is within your budget, by all means go for it! But more often, it’ll be a game of compromise and deciding which aspects are more important to you and which ones can be overlooked or postponed.
Remember there are two things you can’t change about the house: the location, and the plot of land it sits on.
There’s one thing that’s difficult to change: the general structure or “bones” of the house (although if sufficiently motivated, you can always tear it down and build anew).
Most everything else can be tailored to your needs, given enough time and money.
Many of our test runs use parallelization to run faster. Sometimes we see test
failures which we can’t reproduce locally, because locally we usually run
sequentially; and even then, the test ordering seems to be somewhat
unpredictable so it’s hard to reproduce the exact test ordering seen in
our test runner.
Most of the time these failures are due to unidentified test interdependencies:
either test A causes test B to pass (where running test B in isolation would
fail), or test A causes B to fail (where running B in isolation would pass).
And we have seen more complex scenarios where C passes, A-B-C passes, but A-C
fails (because A sets C up for failure, while B would set C up for success). We
added some diagnostic output to our test runner so it would show exactly the
list of tests each process runs. This way we can copy the list and run it
locally, which usually reproduces the failure.
But we needed a tool to then determine exactly which of the tests preceding the
failing one was setting up the failure conditions. So I wrote this simple
bisecter script, which expects a list of test names, which must contain the
faily test “A”, and of course, the name of the faily test
“A”. It looks for “A” in the list and will use
bisection to determine which of the tests preceding “A” is causing
the failure.
As an example, I used it to find a test failure in Ubuntu SSO:
python bisecter.py  test-orders/loadbad1.txt webui.tests.test_decorators.SSOLoginRequiredTestCase.test_account_must_require_two_factor
273 elements in the list, about 8 iterations left
Test causing failure is in second half of given list
137 elements in the list, about 7 iterations left
Test causing failure is in second half of given list
69 elements in the list, about 6 iterations left
Test causing failure is in first half of given list
34 elements in the list, about 5 iterations left
Test causing failure is in second half of given list
17 elements in the list, about 4 iterations left
Test causing failure is in second half of given list
9 elements in the list, about 3 iterations left
Test causing failure is in second half of given list
5 elements in the list, about 2 iterations left
Test causing failure is in second half of given list
3 elements in the list, about 1 iterations left
Test causing failure is in second half of given list
2 elements in the list, about 1 iterations left
Test causing failure is in first half of given list
The test that causes the failure is webui.tests.test_views_account.AccountTemplateTestCase.test_backup_device_warning
We were initially reluctant to consider non-move-in-ready properties, reasoning that we preferred to devote money to a down payment and not have to contend with either moving delays or construction crews around the house. But if the occupancy dates allow for it, considering a renovation job may be worth it, because it could allow you to snatch a more affordable property (perhaps one that buyers are overlooking because of quirky layouts or being in bad condition, needing a kitchen or bathroom renovation, and so on) and use the saved money to renovate, which instantly raises the property’s value.
If you’re concerned that this will leave you somewhat cash-strapped, there’s an option called “Purchase plus Improvements mortgage”. Essentially it allows you to borrow an extra amount (up to 10% of the value the home will have after the improvements) which will be added to the mortgage.
The rules are somewhat complex, particularly the part where you need a quote from a contractor before finalizing the purchase and loan, and the fact that the money is not advanced to you, but paid after the work is done and an appraiser has verified it’s done as requested, meaning you may need to pay for it upfront – it does defeat the purpose a bit, but consider that you could pay for this work with consumer credit or a line of credit, repay that once the extra mortgage amount is released, and then benefit from the very low mortgage interest rates.
In any case, it’s an option which opens up a good set of properties you may pass over because they need renovation.
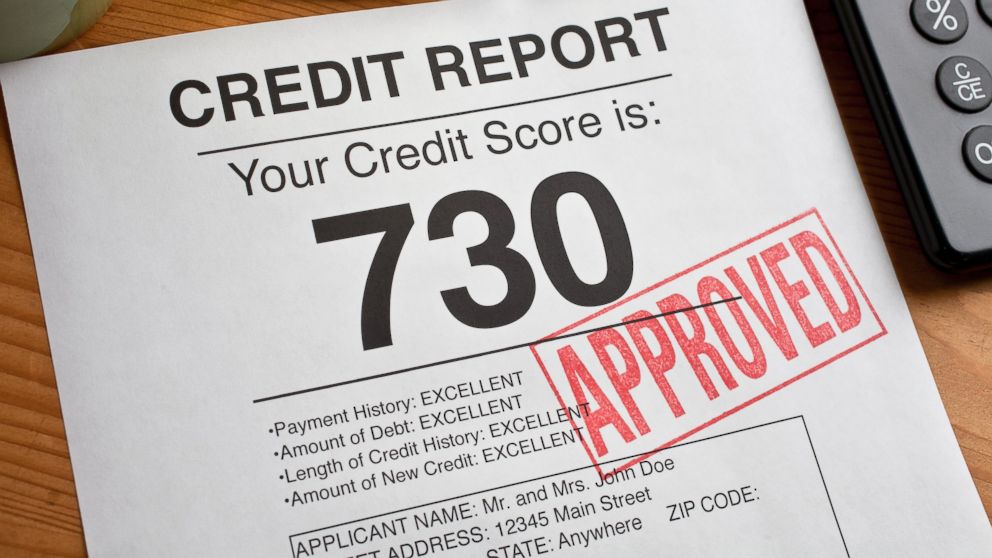
A few of the resources I read mentioned it was a good idea to get a credit report prior to visiting the mortgage lender/broker, so any inaccuracies can be corrected in advance. They indicate the credit report can be obtained free of charge through Equifax or TransUnion.
I went to Equifax (note this was before their 2017 breach – I obviously now recommend you go to TransUnion instead). And their home page is a bit scary offering products protecting you from identity theft (I guess that didn’t help or protect those affected in 2017). But I was only interested in the credit report and score (the score is not necessary but it’s a nice single-number summary of your credit and I though it worth it). They have an option to purchase on-line for $23 so I went with that.
But remember the report can be obtained for free? understandably, this is not terribly visible in their front page, but there it is: “You can receive a free credit file disclosure from Equifax Canada Co. via Canada Post“. That link will take you to a form you can fill out and mail or fax (Fax, really?). So for the cost of a stamp and a bit of waiting you can also have your free credit report.
I was impatient and paid the $23, only to get a scary error when trying to get the report, which necessitated calling Equifax, in the course of the call they tried to upsell me on their credit report monitoring service (it’s cheaper, they said, only $16/month instead of the $23 you’re paying – conveniently not mentioning than the $23 is a one-shot charge). Which product you choose is up to you, just remember to stand your ground if you’re not interested in the more expensive one.
The credit report indicated a reasonably high score and no unusual activity, and should look good to any prospective lenders, so this phase is complete and we’re good to go!
One of the changes to mortgage rules for 2016 in Canada is the creation of the “stress test“, meant to cool down hot real estate markets and keep people from buying houses that stretch their financial capabilities.
If you’re going for a high-ratio (less than 20% down payment) mortgage, lenders are required by law to check your payment capacity as if your loan interest rate were as high as the standard five-year rate (which currently is 4.94%), even if your eventual mortgage will actually be at a much lower (currently around 2-2.5%) rate.
The FCAC calculator makes it very easy to check what your maximum loan will be, once this rule is taken into account. Just enter your information and your expected interest rate to calculate your real maximum mortgage. Next, change the interest rate to 4.95% (I went super safe and put in 5%). It will tell you you won’t qualify, but you can now play with the maximum property value until it shows you you’re likely to be approved.
In my case, it resulted in a reduction of 18% in the maximum price I could afford, which is not terrible because all my previous calculations were taking this into account. Some people may be surprised, and discouraged out of the house hunting process by this, but if you know about this rule and factor it in your calculations prior to starting the process, you’ll know what to expect and how to compensate (get more money, save up for a larger down payment, lower your house price range).
So we decided to buy a house, what will the journey look like?
There are plenty of easily-googlable resources on the house buying process in Canada and in Québec more specifically (here’s the two most detailed I’ve seen: FCAC and CMHC), so I won’t try to repeat that information, but I’ll document the specifics of our process which will invariably result in a brief outline of the steps to follow.
Roughly what we’ll try to do:
Get a relatively good family income so we can qualify for a reasonable mortgage loan.
Build up a credit history.
Save up for a down payment.
We’ve worked on those first three steps since we moved to Canada: I’ve been fortunate enough to have a stable and well-paid job, which has allowed us to use consumer credit responsibly, so should have a pretty good rating. It also allowed us to save for a down payment. So at this point we should be ready for the next parts of the process:
See a lender to get financially checked and pre-approved for a loan. You can go for a well-known financial institution, perhaps your bank, or you can go to a mortgage broker, which is what I’m planning on doing.
Once you know your price range, you can start looking at houses in your desired areas.
BUT before you can start with this, you should know roughly how much you can afford, be realistic with your inputs and use one of the available online calculators. I like this one which will tell you how much you should be able to afford, and this one which calculates your estimated payments. And this one is very simple but also very detailed as to the criteria used to estimate affordability. It makes sense to use this so you’re not disappointed when the broker tells you you can only afford a tiny shack in the boondocks :).
You should also have a pretty good idea of whether you like your target neighbourhood. Montreal is a geographically large city and neighbourhoods can differ, so it makes sense to check the ones you like and make a short list. If you don’t care where you buy, there’s something for almost any price range, but I don’t think that’s very common.
A possible problem with the neighbourhood you like is whether you can afford it. If you can’t just yet, there are two options: choose a different one or get more money (higher salary, larger down payment).
Once I identified our target neighbourhoods, I started scouring centris.ca frequently, looking for houses in (and out of) our price range, checking their pictures and prices, nearby amenities, and comparing several possible neighbourhoods. We ended up discarding one of those, even though it was cheaper and had more inventory, because we decided we didn’t really like it that much. So we’re focusing on one of the other candidates, and also looking at adjacent neighbourhoods, which can be cheaper while still being closer to the amenities we want.
OK, so knowing how much we can afford (per the calculators) having located (and lived in) a neighborhood we like and knowing the approximate price range for homes here, and knowing it is within our affordability, I’m ready to hit the mortgage broker.
---- name:Run a local task hosts:127.0.0.1connection:localtasks: - name:loop the loopuri:url:http://www.someurl.example.com/status.htmlreturn_content:yesregister:foountil:foo.content.find("monkeys") != -1delay:1retries:5
The task can be whatever you want: I used uri but it’s more usually shell or something like that. The main thing is that you need to use register so you’ll have something to check in the until: condition.
Recently I ran into a script which tried to verify HTTPS connection and response to a specific IP address. The “traditional” way to do this is (assuming I want http://example.com/some/path on IP 1.2.3.4):
This is useful if I want to specifically test how 1.2.3.4 is responding; for instance, if example.com is DNS round-robined to several IP addresses and I want to hit one of them specifically.
This also works for https requests if using Python <2.7.9 because older versions don’t do SNI and thus don’t pass the requested hostname as part of the SSL handshake.
However, Python >=2.7.9 and >=3.4.x conveniently added SNI support, breaking this hackish way of connecting to the IP, because the IP address embedded in the URL is passed as part of the SSL handshake, causing errors (mainly, the server returns a 400 Bad Request because the SNI host 1.2.3.4 doesn’t match the one in the HTTP headers example.com).
The “easiest” way to achieve this is to force the IP address at the lowest possible level, namely when we do socket.create_connection. The rest of the “stack” is given the actual hostname. So the sequence is:
Open a socket to 1.2.3.4
SSL wrap this socket using the hostname.
Do the rest of the HTTPS traffic, headers and all over this socket.
Unfortunately Requests hides the socket.create_connection call in the deep recesses of urllib3, so the specified chain of classes is needed to propagate the given dest_ip value all the way down the stack.
After wrestling with this for a bit, I wrote a TransportAdapter and accompanying stack of subclasses to be able to pass a specific IP for connection.
There are a good number of subtleties on how it works, because it messes with the connection stack at all levels, I suggest you read the README to see how to use it in detail and whether it applies to you need. I even included a complete example script that uses this adapter.
If juju1 and juju2 are installed on the same system, juju1’s bash auto completion breaks because it expects services where in juju2 they’re called applications.
Maybe juju2 has correct bash completion, but in the system I’m working on, only juju1 autocompletion was there, so I had to hack the autocomplete functions. Just added these at the end of .bashrc to override the ones in the juju1 package. Notice they work for both juju1 and juju2 by using dict.get() to not die if a particular key isn’t found.
# Print (return) all units, each optionally postfixed by $2 (eg. 'myservice/0:')_juju_units_from_file(){python -c '
trail="'${2}'"
import json, sys; j=json.load(sys.stdin)
all_units=[]
for k,v in j.get("applications", j.get("services",{})).items():
if v.get("units"):
all_units.extend(v.get("units",{}).keys())
print "\n".join([unit + trail for unit in all_units])
'<${1?}}# Print (return) all services_juju_services_from_file(){python -c '
import json, sys; j=json.load(sys.stdin)
print "\n".join(j.get("applications", j.get("services",{}).keys());'<${1?}}
I’m working on adding some periodic maintenance tasks to a service deployed using Juju. It’s a standard 3-tier web application with a number of Django application server units for load balancing and distribution.
Clearly the maintenance tasks’ most natural place to run is in one of these units, since they have all of the application’s software installed and doing the maintenance is as simple as running a “management command” with the proper environment set up.
A nice property we have by using Juju is that these application server units are just clones of each other, this allows scaling up/down very easily because the units are treated the same. However, the periodic maintenance stuff introduces an interesting problem, because we want only one of the units to run the maintenance tasks (no need for them to run several times). The maintenance scripts can conceivably be run in all units, even simultaneously (they do proper locking to avoid stepping on each other). And this would perhaps be OK if we only had 2 service units, but what if, as is the case, we have many more? there is still a single database and hitting it 5-10 times with what is essentially a redundant process sounded like an unacceptable tradeoff for the simplicity of the “just run them on each unit” approach.
We could also implement some sort of duplicate collapsing, perhaps by using something like rabbitmq and celery/celery beat to schedule periodic tasks. I refused to consider this since it seemed like swatting flies with a cannon, given that the first solution coming to mind is a one-line cron job. Why reinvent the wheel?
The feature that ended up solving the problem, thanks to the fine folks in Freenet’s #juju channel, is leadership, a feature which debuted in recent versions of Juju. Essentially, each service has one unit designated as the “leader” and it can be targeted with specific commands, queried by other units (‘ask this to my service’s leader’) and more importantly, unambiguously identified: a unit can determine whether it is the leader, and Juju events are fired when leadership changes, so units can act accordingly. Note that leadership is fluid and can change, so the charm needs to account for these changes. For example, if the existing leader is destroyed or has a charm hook error, it will be “deposed” and a new leader is elected from among the surviving units. Luckily all the details of this are handled by Juju itself, and charms/units need only hook on the leadership events and act accordingly.
So it’s then as easy as having the cron jobs run only on the leader unit, and not on the followers.
The simplistic way of using leadership to ensure only the leader unit performs an action was something like this in the crontab:
* * * * * root if [ $(juju-run {{ unit_name }} is-leader) = 'True' ]; then run-maintenance.sh; fi
This uses juju-run with the unit’s name (which is hardcoded in the crontab – this is a detail of how juju run is used which I don’t love, but it works) to run the is-leader command in the unit. This will print out “True” if the executing unit is the leader, and False otherwise. So this will condition execution on the current unit being the leader.
Discussing this with my knowledgeable colleagues, a problem was pointed out: juju-run is blocking and could potentially stall if other Juju tasks are being run. This is possibly not a big deal but also not ideal, because we know leadership information changes infrequently and we also have specific events that are fired when it does change.
So instead, they suggested updating the crontab file when leadership changes, and hardcoding leadership status in the file. This way units can decide whether to actually run the command based on locally-available information which removes the lock on Juju.
The solution looks like this, when implemented using Ansible integration in the charm. I just added two tasks: One registers a variable holding is-leader output when either the config or leadership changes:
The second one fires on the same events and just uses the registered variable to write the crontabs appropriately. Note that Ansible’s “cron” plugin takes care of ensuring “crupdate” behavior for these crontab entries. Just be mindful if you change the “name” because Ansible uses that as the key to decide whether to update or create anew:
- name:create maintenance crontabstags: - config-changed - leader-elected - leader-settings-changedcron:name:"roadmr maintenance - {{item.name}}"special_time:"daily"job:"IS_LEADER='{{ is_leader.stdout }}'; if [ $IS_LEADER = 'True' ]; then {{ item.command }}; fi"cron_file:roadmr-maintenanceuser:"{{ user }}"with_items: - name:Delete all fooscommand:"delete_foos" - name:Update all barscommand:"update_bars"
A created crontab file (in /etc/cron.d/roadmr-maintenance) looks like this:
A few notes about this. The IS_LEADER variable looks redundant. We could have put it directly in the comparison or simply wrote the crontab file only in the leader unit, removing it on the other ones. We specifically wanted the crontab to exist in all units and just be conditional on leadership. IS_LEADER makes it super obvious, right there in the crontab, whether the command will run. While redundant, we felt it added clarity.
Save for the actual value of IS_LEADER, the crontab is present and identical in all units. This helps people who log directly into the unit to understand what may be going on in case of trouble. Traditionally people log into the first unit; but what if that happens to not be the leader? If we write the crontab only on the leader and remove from other units, it will not be obvious that there’s a task running somewhere.
Charm Ansible integration magically runs tasks by tags identifying the hook events they should fire on. So by just adding the three tags, these events will fire in the specified order on config-changed, leader-elected and leader-settings-changed events.
The two leader hooks are needed because leader-elected is only fired on the actual leader unit; all the others get leader-settings-changed instead.
Last but not least, on’t forget to also declare the new hooks in your hooks.py file, in the hooks declaration which now looks like this (see last two lines added):
Finally, I’d be remiss not to mention an existing bug in leadership event firing. Because of that, until leadership event functionality is fixed and 100% reliable, I wouldn’t use this technique for tasks which absolutely, positively need to be run without fail or the world will end. Here, I’m just using them for maintenance and it’s not a big deal if runs are missed for a few days. That said, if you need a 100% guarantee that your tasks will run, you’ll definitely want to implement something more robust and failproof than a simple crontab.