The Keychron K2 and K3 have dual-purpose media/function keys. The accompanying card says to use fn+x+l to change modes, but I tried it and it didn’t work. I need my function keys, I’m already used to pressing fn when I do need to access multimedia functionality.
I found this repo which explains how to set up a systemd service to configure the keys by writing a value to a driver configuration file. This works, but I was also able to get this changed immediately (though not persistently) by doing:
# Set the keys to operate in Fx mode
echo 0 | sudo tee /sys/module/hid_apple/parameters/fnmode

# Set the keys to operate in multimedia mode

echo 1 | sudo tee /sys/module/hid_apple/parameters/fnmode
I’m cheating because this uses virtualbox.
This is ubuntu 20.04.
install these debs:
virtualbox
virtualbox-dkms
virtualbox-ext-pack
virtualbox-guest-additions-iso
Download this Win10 evaluation/development VM
or a suitable one from here
Unzip the file, then on virtualbox, import the VM from the ova file.
Update settings for the VM and enable USB controller, with xHCI so it doesn’t take ages to transfer files.
Boot the VM, log in.
Download itunes from apple inside the vm (maybe with edge):
https://www.apple.com/itunes/download/win64
(I couldn’t install from the ms app store because reasons)
Start itunes by keeping SHIFT pressed while opening itunes:
https://support.apple.com/en-ca/guide/itunes/itns3259/windows
Choose the path where the itunes library is.
We added a new device which can expose a connected USB drive via DLNA, internally it uses minidlna which uses SSDP for service discovery. For some strange reason that rendered my *existing* minidlna (hosted on a raspberry pi) invisible. When researching the problem, it looks like neighbor discovery (which didn’t happen before as there were no other devices) uses a multicast 239.0.0.0/8 address which my rpi was blocking due to reasons (only allows traffic via the local network and a vpn gateway). My theory is that the new minidlna device took over as “primary” and then couldn’t find other peers and so the old server wasn’t visible anymore. The solution was to allow the specific multicast address used by SSDP.
#!/bin/bash
iptables -F
#Tunnel interface
iptables -A INPUT -i tun+ -j ACCEPT
iptables -A OUTPUT -o tun+ -j ACCEPT
#Localhost and local networks
iptables -A INPUT -s 127.0.0.0/16 -j ACCEPT
iptables -A OUTPUT -d 127.0.0.0/16 -j ACCEPT
iptables -A INPUT -s 192.168.0.0/16 -j ACCEPT
iptables -A OUTPUT -d 192.168.0.0/16 -j ACCEPT
#multicast for minidlna/SSSP
iptables -I OUTPUT -d 239.255.255.250 -j ACCEPT
iptables -I INPUT -d 239.255.255.250 -j ACCEPT
#Allow VPN establishment, this is the port in the config's #remote
iptables -A OUTPUT -p udp --dport 1198 -m state --state NEW,ESTABLISHED -j ACCEPT
iptables -A INPUT -p udp --sport 1198 -m state --state ESTABLISHED,RELATED -j ACCEPT
#Drop everything else
iptables -A INPUT -j DROP
iptables -A OUTPUT -j DROP
These mkv files have h.265 hevc video which my media player can’t read, so I’d like to convert only the video stream to h.264, while leaving all other streams (2 audio tracks in aac, 2 subtitle tracks) intact.
ffmpeg -i some-x265-video.mkv -map 0 -c:v libx264 -c:a copy /tmp/x264-version.mkv
Working remotely for a timezone-distributed company poses an interesting challenge: that of having to figure out dates and times for people in different timezones. This involves not only the relatively trivial “what time is it now in A_FARAWAY_PLACE”, but “what time, in FARAWAY_PLACE_X, will it be in FARAWAY_PLACE_Z” and other fun things.
There are a handful of websites that have handy tools to do these conversions for you; but a problem I’ve found is that the web is going to the crapper, and these sites often have confusing UIs concocted by some javascript-crazed, CSS-infected webmonkey; and often they are completely swamped and rendered unusable by a rising tide of ads and other aggressive content (oh and some won’t let you do anything until you agree to them storing information in cookies in your browser – which they then bafflingly don’t use to store the PREFERENCE you have selected , so like a forgetful vampire, they ask you every single time if you want to accept their silly cookies).
I’ve known how to use the date command to show the date on a different place/timezone, which is already a huge timesaver:
$ TZ="Taiwan/Taipei" date
Fri Apr 12 19:25:31 Taiwan 2019
but – today I was trying to answer “what time in TZ=”America/Chicago” is 1 PM, on Tuesday, in “UK/London“. This is interesting because it’s conversion between two timezones which are not the one I’m in, of a date/time in the future. So I was checking date’s man page for “how to convert a specific point in time”, when I realized date can do this for you! Right in the man page there’s this example:
Show the local time for 9AM next Friday on the west coast of the US
$ date --date='TZ="America/Los_Angeles" 09:00 next Fri'
so then I combined that with the earlier one to come up with:
$ TZ="America/Chicago" date --date='TZ="UK/London" 1:00 PM next Tue'
Tue Apr 16 08:00:00 CDT 2019
This combines:
- TZ argument to calculate dates for a specific timezone, not the current one
--date parameter to “display time described by STRING, not ‘now’”- Descriptive time specifications (1:00 PM next Tuesday – this is a pseudo-human-readable format which is not entirely intuitive – info date has the specifics)
- TZ support inside the descriptive specification
And a list of known timezones can be obtained with timedatectl list-timezones.
In this case I’m hosting the VM on a fast server and trying to access the display on another system (a laptop).
One way to do it is by simply SSHing with X forwarding and running KVM like so:
qemu-system-x86_64 -boot d -cdrom ubuntu-18.04.2-live-server-amd64.iso -m 8192 -enable-kvm
This by default uses a terminal window, but it’s quite slow.
Another option is to start the KVM machine in nographic mode and enable a VNC server:
qemu-system-x86_64 -nographic -vnc :5 -boot d -cdrom ubuntu-14.04.6-desktop-amd64.iso -m 8192 -enable-kvm
then on the desktop system use a vnc client to connect to the magic port:
xtightvncviewer thehost.local:5905
The goal here is to instantiate VMs with a br0 interface grabbing an IP from the LAN DHCP, so in turn the VM can instantiate LXD containers whose IP is also exposed to the LAN. That way everything is visible on the same network segment and this makes some experimentation easier.
Host configuration
Some info taken from this URL.
The metal host is running Ubuntu 18.04, which uses netplan. Here’s the netplan.yaml file:
network:
    ethernets:
        enp7s0:
            addresses: []
            dhcp4: no
            dhcp6: no
            optional: true
    bridges:
        br0:
            dhcp4: true
            dhcp6: no
            interfaces:
                - enp7s0
            parameters:
                stp: false
                forward-delay: 0
    version: 2
With this, on boot the system grabs an address from the network’s DHCP service (from my home router) and puts it on the br0 interface (which bridges enp7s0, a Gigabit Ethernet port).
The system also has avahi-daemon installed so I can ssh the-server.local easily.
VM configuration
Next, the VM which I created using uvt-kvm:
# Get a Xenial cloud image
uvt-simplestreams-libvirt --verbose sync release=xenial arch=amd64
# Create/launch a VM
PARAMS='--memory 8192 --disk 32 --cpu 4'
uvt-kvm create the-vm  $PARAMS --bridge br0 --packages avahi-daemon,bridge-utils,haveged --run-script-once setup_network.sh
The setup_network.sh script takes care of setting up the network 🙂 This can more cleanly be done with cloud-init but I’m lazy and wanted something fast.
The script deletes the cloudconfig-created .cfg file, tells cloud-init to NOT reconfigure the network, and drops the config file I actually need in place.
#!/bin/bash

echo "Acquire::http::Proxy \"http://192.168.1.187:3128\"; " >/etc/apt/apt.conf.d/80proxy

# Drop the cloudinit-configured interface
ifdown ens3

# Reconfigure the network...
cat <<EOF >/etc/network/interfaces.d/1-bridge.cfg
auto lo br0

iface lo inet loopback

iface ens3 inet manual

iface br0 inet dhcp
    bridge_ports ens3
    bridge_stp off       # disable Spanning Tree Protocol
    bridge_waitport 0    # no delay before a port becomes available
    bridge_fd 0          # no forwarding delay
EOF

echo "network: {config: disabled}" > /etc/cloud/cloud.cfg.d/99-disable-network-config.cfg
rm /etc/network/interfaces.d/50-cloud-init.cfg

# Then bring up the new nice bridge
ifup br0

apt-get remove -y snapd && apt-get -y autoremove
The network config in /etc/network/interfaces.d/1-bridge.cfg should look like:
auto lo br0

iface lo inet loopback

iface ens3 inet manual

iface br0 inet dhcp
    bridge_ports ens3
    bridge_stp off       # disable Spanning Tree Protocol
    bridge_waitport 0    # no delay before a port becomes available
    bridge_fd 0          # no forwarding delay
LXD configuration
Finally, install lxd. When asked to configure the lxd bridge, respond
“no”, and on the next question you’ll be asked whether to
supply an existing bridge. Respond “yes” and specify
“br0”.
Now, when an lxd container is instantiated, it’ll by default appear on
the same network (the home network!) as the VM and the main host, getting its
DHCP from the home router.
When things break
Suddenly the bridge interface stopped working. I checked this to help diagnose
it. But that wasn’t it. Turns out, I’d installed Docker on the
main host and Docker messes with the firewall
configuration by setting
iptables -P FORWARD DROP. I just set it back to ACCEPT to get it working.
Many of our test runs use parallelization to run faster. Sometimes we see test
failures which we can’t reproduce locally, because locally we usually run
sequentially; and even then, the test ordering seems to be somewhat
unpredictable so it’s hard to reproduce the exact test ordering seen in
our test runner.
Most of the time these failures are due to unidentified test interdependencies:
either test A causes test B to pass (where running test B in isolation would
fail), or test A causes B to fail (where running B in isolation would pass).
And we have seen more complex scenarios where C passes, A-B-C passes, but A-C
fails (because A sets C up for failure, while B would set C up for success). We
added some diagnostic output to our test runner so it would show exactly the
list of tests each process runs. This way we can copy the list and run it
locally, which usually reproduces the failure.
But we needed a tool to then determine exactly which of the tests preceding the
failing one was setting up the failure conditions. So I wrote this simple
bisecter script, which expects a list of test names, which must contain the
faily test “A”, and of course, the name of the faily test
“A”. It looks for “A” in the list and will use
bisection to determine which of the tests preceding “A” is causing
the failure.
As an example, I used it to find a test failure in Ubuntu SSO:
python bisecter.py  test-orders/loadbad1.txt webui.tests.test_decorators.SSOLoginRequiredTestCase.test_account_must_require_two_factor
273 elements in the list, about 8 iterations left
Test causing failure is in second half of given list
137 elements in the list, about 7 iterations left
Test causing failure is in second half of given list
69 elements in the list, about 6 iterations left
Test causing failure is in first half of given list
34 elements in the list, about 5 iterations left
Test causing failure is in second half of given list
17 elements in the list, about 4 iterations left
Test causing failure is in second half of given list
9 elements in the list, about 3 iterations left
Test causing failure is in second half of given list
5 elements in the list, about 2 iterations left
Test causing failure is in second half of given list
3 elements in the list, about 1 iterations left
Test causing failure is in second half of given list
2 elements in the list, about 1 iterations left
Test causing failure is in first half of given list
The test that causes the failure is webui.tests.test_views_account.AccountTemplateTestCase.test_backup_device_warning
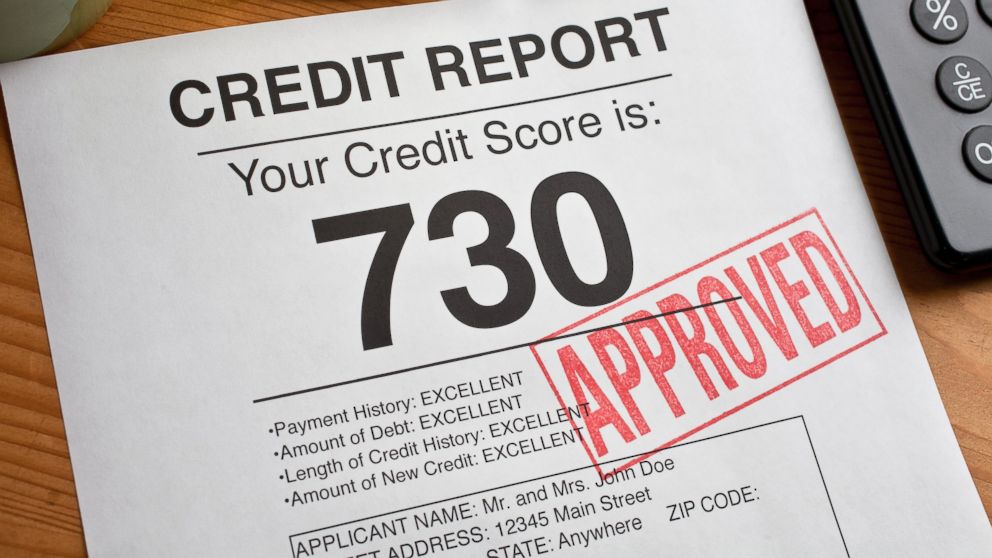
A few of the resources I read mentioned it was a good idea to get a credit report prior to visiting the mortgage lender/broker, so any inaccuracies can be corrected in advance. They indicate the credit report can be obtained free of charge through Equifax or TransUnion.
I went to Equifax (note this was before their 2017 breach – I obviously now recommend you go to TransUnion instead). And their home page is a bit scary offering products protecting you from identity theft (I guess that didn’t help or protect those affected in 2017). But I was only interested in the credit report and score (the score is not necessary but it’s a nice single-number summary of your credit and I though it worth it). They have an option to purchase on-line for $23 so I went with that.
But remember the report can be obtained for free? understandably, this is not terribly visible in their front page, but there it is: “You can receive a free credit file disclosure from Equifax Canada Co. via Canada Post“. That link will take you to a form you can fill out and mail or fax (Fax, really?). So for the cost of a stamp and a bit of waiting you can also have your free credit report.
I was impatient and paid the $23, only to get a scary error when trying to get the report, which necessitated calling Equifax, in the course of the call they tried to upsell me on their credit report monitoring service (it’s cheaper, they said, only $16/month instead of the $23 you’re paying – conveniently not mentioning than the $23 is a one-shot charge). Which product you choose is up to you, just remember to stand your ground if you’re not interested in the more expensive one.
The credit report indicated a reasonably high score and no unusual activity, and should look good to any prospective lenders, so this phase is complete and we’re good to go!

One of the changes to mortgage rules for 2016 in Canada is the creation of the “stress test“, meant to cool down hot real estate markets and keep people from buying houses that stretch their financial capabilities.
If you’re going for a high-ratio (less than 20% down payment) mortgage, lenders are required by law to check your payment capacity as if your loan interest rate were as high as the standard five-year rate (which currently is 4.94%), even if your eventual mortgage will actually be at a much lower (currently around 2-2.5%) rate.
The FCAC calculator makes it very easy to check what your maximum loan will be, once this rule is taken into account. Just enter your information and your expected interest rate to calculate your real maximum mortgage. Next, change the interest rate to 4.95% (I went super safe and put in 5%). It will tell you you won’t qualify, but you can now play with the maximum property value until it shows you you’re likely to be approved.
In my case, it resulted in a reduction of 18% in the maximum price I could afford, which is not terrible because all my previous calculations were taking this into account. Some people may be surprised, and discouraged out of the house hunting process by this, but if you know about this rule and factor it in your calculations prior to starting the process, you’ll know what to expect and how to compensate (get more money, save up for a larger down payment, lower your house price range).