I finally got around to updating my server to Debian Bullseye from Buster. The thing that had been holding me was this notice in the upgrade notes:
Please consider the version of Exim in bullseye a major Exim upgrade. It introduces the concept of tainted data read from untrusted sources.
The basic strategy for dealing with this change is to use the result of a lookup in further processing instead of the original (remote provided) value.
To ease upgrading there is a new main configuration option to temporarily downgrade taint errors to warnings, letting the old configuration work with the newer Exim. To make use of this feature add
to the Exim configuration (e.g. to /etc/exim4/exim4.conf.localmacros) before upgrading and check the logfile for taint warnings. This is a temporary workaround which is already marked for removal on introduction.
This sounded scary, so I put it off for years, but then I decided to just do it since the docs above said one could set the allow_insecure option and then check the logs for specific problems. Alas, after the upgrade my exim started bouncing mails due to a lookup error:
temporarily rejected RCPT <someonetomechangosubanana.com>: Tainted name '/etc/exim4/WHATEVER' for file read not permitted
Long story short, instead of injecting a tainted variable when expanding a string; in this case, for a router’s file option like so:
The operation to perform, a single-key lookup in this case.
The key to search for. In the examples above, we build the key from user-input data, which is fine by the tainting rules, as long as that’s used just to look up data in a database, table or file listing. The point of taintedness is to NOT use the tainted value itself to build values that will go, for example, in filenames.
This is the type of lookup, dsearch is “directory search” - this will look for a file named KEY in the ABS_DIR directory, and return (this is the important part) the NAME OF THE FILE IT FOUND, not the value of the key (which might be evil).
ret=full just means “return the entire value”, in this case, the full path, rather than just the file name.
ABS_DIR is the directory where we will search for the file.
{$value} is what gets returned if the lookup is successful. In this case we want to return the actual value that was found.
If the lookup fails, then this value gets returned. If not specified, it always returns the empty string, which resulted in another error:"" is not an absolute path because then it thinks we’re assigning "" to the router’s file. Instead, what we want is for the thing to fail so the router gets marked as unprocessed and the processing continues in the normal order. Specifying the special value fail gives that behavior.
With these changes, the routers work as they did before, while following the rules about when and how to use a tainted user-input value.
Luckily for the upgrade to Bookworm and Exim 4.96, there is no such breaking change in exim configuration!
How to convert a flac-extracted album to aac? this will lose quality but aac files are more compact and I don’t need the super extra audiophile quality.
Assume there’s a .flac file and corresponding .cue file for the entire album.
shnsplit can do it in one fell swoop, just ensure you have shnsplit and fdkaac installed and then:
I recently saw some discussions on line about people mentioning they’d been blogging for 20 or 25 years and it got me thinking.
How long have I been blogging?
My page famously claims “since 1995” - I’m fairly certain that’s about when I created my first personal web page which lived at http://teesa.com/~roadmr (https was incredibly arcane and hard to set up back then). I don’t remember what it contained; Sadly the Internet Archive has no record of this page’s original content; this could be because the Internet Archive’s Wayback Machine wasn’t launched until May 1996!
The only snapshots of that URL are from May, 1997; by then it already only contained a “We Moved” link pointing to what would be my home page for the next decade, at least: http://www.entropia.com.mx/~roadmr. Even if the first snapshot of that page in Wayback Machine is from December, 1998, it can be seen that I’ve demonstrably had at least a form of web page since 1997.
My page looked like this for maybe 5 years, being basically a collection of pages and links with no chronology.
The first appearance of an actual blog-like format is in 2002. I used a PHP application called Personal Weblog. I didn’t (and still don’t) blog much, so this choice of tooling was reasonable for what I wrote, which were short-length snippets reminiscent of what would later become “twitter”.
Eventually, if I remember correctly, I nuked all the files in an accident and decided to go for broke and install Wordpress, which I did in November 2005. I continued to use Wordpress consistently, even after the move to my new URL https://www.tomechangosubanana.com in 2006; indeed the last Wayback Machine snapshot of http://www.entropia.com.mx/~roadmr dates from sometime in 2005-2006.
I’ve managed to keep / migrate all my content since then, so my first Wordpress post can still be seen here; only it’s now stored as static content which is rendered by Hugo, to which I migrated in 2021, after 16 years on Wordpress.
So by the above and my calculations:
Had a web page since 1995 (28 years at time of writing)
If you don’t want to believe that claim and prefer to go with the provable that I’ve had a web page since 1997, that’s fine by me :) it’s still 26 years at time of writing.
Been blogging since 2002 (21 years at time of writing).
Been on the same URL since 2006 (17 years at time of writing).
$ ssh bazaar.launchpad.net
X11 forwarding request failed on channel 0No shells on this server.
Connection to bazaar.launchpad.net closed.
# The above is successful, the server did accept the connection \o/
The previous technique uses a one-shot systemd unit to run a command that sets a bit in the keyboard’s /sys device. It works generally well, but my experience has shown that it assumes the keyboard is always present at boot time (when the multi-user systemd target runs). this is not always the case for me because I use the keyboard primarily over Bluetooth; sometimes I turn it off when I’m going to be away for a while / overnight, and the keyboard itself disconnects and sleeps after 10 minutes of inactivity.
Annoyed at having to run the sys command manually every time the keyboard disconnects, I wrote a udev rule to handle this when the keyboard connect or disconnects. This is similar to my old Logitech K380 which uses this to toggle function key settings and uses a udev rule from here.
I first had to determine which parameters to use to write a rule that fires when the device is added. I followed this guide on how to write udev rules, and first obtained the input device for the Keychron keyboard by grepping, with the keyboard connected:
Next, I checked the attributes for the associated input device thingy:
$ udevadm info -a -p /sys/bus/hid/devices/0005:05AC:024F.004B/input/input89
looking at device '/devices/pci0000:00/0000:00:14.0/usb3/3-10/3-10:1.0/bluetooth/hci0/hci0:256/0005:05AC:024F.004B/input/input89':
KERNEL=="input89"SUBSYSTEM=="input"DRIVER=="" ATTR{inhibited}=="0" ATTR{properties}=="0" ATTR{name}=="Keychron K3" ATTR{uniq}=="dc:2c:26:0c:69:7d" ATTR{phys}=="dc:41:a9:a1:97:6b" looking at parent device '/devices/pci0000:00/0000:00:14.0/usb3/3-10/3-10:1.0/bluetooth/hci0/hci0:256/0005:05AC:024F.004B':
KERNELS=="0005:05AC:024F.004B"SUBSYSTEMS=="hid"DRIVERS=="apple" ATTRS{country}=="21"
The device itself and its parent provide enough information to write a rule using the “name” attribute and the “DRIVERS” from the hid device. I could have used another parent higher up the tree, but this seemed fine, because apparently the next parent up is either a bluetooth or a USB thing, and I wanted the rule to work whether I connect via either method; so using the hid subsystem’s apple driver which is commeon to both, and the final input device which is unequivocally the Keychron keyboard, works with both.
Assuming one were to want different configurations for multiple connected Keychrons of the same model/name, one could scope the rule by ATTR{phys}.
The resulting udevadm rule can be written to disk like so:
cat <<EOF | sudo tee /etc/udev/rules.d/80-keychron-k3.rules
# Drivers comes from the parent device (hid bluetooth)
# ATTR{name} is from the input subsystem device
ACTION=="add", DRIVERS=="apple", ATTR{name}=="Keychron K3", RUN+="/usr/local/bin/keychron-k3-fnkeys"
EOF
And then the actual script is very simple/unrefined, since it doesn’t depend on any variables that change each time the device is connected (which we might be able to get via udev variables somehow):
#!/bin/bash
# Place this in /usr/local/bin/keychron-k3-fnkeys# Runs as root so no sudo is neededecho0 > /sys/module/hid_apple/parameters/fnmode
remember to make the script executable sudo chmod 755 /usr/local/bin/keychron-k3-fnkeys and it should run from the udev rule upon connecting the Keychron keyboard.
If you do any kind of support or deal with customers in any way, it’s likely that 80% of incoming requests can be served by sending a canned reply about one of a handful of common issues.
I keep my canned replies in a specific directory, copy them to the clipboard using xclip and then paste them in whichever web-based ticketing system the request comes from.
For this I used to rely on CTRL-R completion using fzf, but that’s becoming kind of unwieldy; so instead, I crafted an fzf-powered oneliner that gives me a responses command. I run that and I get a list of all the canned responses in the directory with auto-completion as per fzf, and also a nice preview window so I can ensure the text contains what I need to send. On pressing ENTER, this is put in the clipboard courtesy of xclip ready to be pasted.
function responses(){ xclip -selection c $(find ~/Documents/w/responses -type f | fzf --preview-window='up:40%' --preview 'cat {}')}
I recently learned about systemd-nspawn which some pages claim to be similar in functionality to LXC with simpler setup as most of the pieces are already there in modern Linux distributions.
Since using LXD without snap has become cumbersome, I decided to give systemd-nspawn a try.
Setup
Start with a clean Ubuntu 20.04 server install. This seems to be running systemd-networkd by default.
$ machinectl list
MACHINE      CLASS     SERVICE        OS     VERSION ADDRESSES
ubuntu-20.04 container systemd-nspawn ubuntu 20.04   192.168.8.165…
# I hate how systemd commands eat output
$ machinectl list -l
MACHINE      CLASS     SERVICE        OS     VERSION ADDRESSES
ubuntu-20.04 container systemd-nspawn ubuntu 20.04   192.168.1.11
                                                     169.254.70.231
                                                     fe80::d891:ecff:fe00:6958

1 machines listed.
Doing things in the container
It can be accessed as a “regular” VM or machine via the console.
# Start an interactive (root) session
machinectl shell ubuntu-20.04
Connected to machine ubuntu-20.04. Press ^] three times within 1s to exit session.
root@focal:~# exit
Configuring the container
Running a container as per above using machinectl uses a set of default options which work well in complete isolation (one can shell to it and copy files and use the network from the container), but a container is more interesting if it can interact with host resources like files and being a network server. Most of this can be configured via the command line by using systemd-nspawn instead of machinectl. But it’s also possible to configure most options via nspawn unit files, which feel similar to LXD configuration profiles to an extent. So that’s the technique I’m going to use to customize most of the settings for my containers below.
Networking
If systemd-networkd is installed on both the host and the guest, virtualized networking gets configured automatically. This is an interesting advantage of using Ubuntu Server 20.04, as systemd-networkd is there by default.
The machine is visible from the host:
$ ping 192.168.8.165
PING 192.168.8.165 (192.168.8.165) 56(84) bytes of data.
64 bytes from 192.168.8.165: icmp_seq=1 ttl=64 time=0.130 ms
64 bytes from 192.168.8.165: icmp_seq=2 ttl=64 time=0.065 ms
64 bytes from 192.168.8.165: icmp_seq=3 ttl=64 time=0.095 ms
Make the machine visible to other hosts
I’m sure some portmapping trickery would work but since this is a container and should stand on its own, I wanted an alternative to lxd’s bridged networking where the container appears in the same network as the host, as a kind of “sibling”.
The thing to do is to create a bridge on the host system. This page has a good amount of detail on how to do that - in our example, it can be done in our ubuntu-server system by disabling cloud-init network config and creating a manual netplan config file:
# Do this as root, or use | sudo tee as appropriate
echo "network: {config: disabled}" > /etc/cloud/cloud.cfg.d/99-disable-network-config.cfg
rm /etc/network/interfaces.d/50-cloud-init.yaml
# ens3 is the name of the network interface in the host, change accordingly.
cat << EOF > /etc/netplan/01-bridge.yaml
network:
  version: 2
  renderer: networkd
  ethernets:
    ens3:
      dhcp4: no
  bridges:
    br0:
      dhcp4: yes
      interfaces:
          - ens3
EOF
# Apply the configuration, or reboot
netplan apply
Once that’s done, configure the container to use the bridge (br0 as just configured):
In this mode the container uses the same network as the host (application container mode), it looks like a Docker container where all ports are “forwarded” to the host by default.
In the LXC world we had a very nice profile which enabled things such as:
- mapping your host user into the container with the same name
- Adding the user into the container with sudo permissions and no-password requirement
- installing your preferred shell
- Mapping your home directory into the container on the same location
- (Optionally mapping host directories into the container)
This can be achieved with systemd-nspawn by using the same user IDs in the container and the host system. For this, ensure the image is pristine and has never been started with systemd-nspawn or machinectl (without the proper setup, these commands will change file ownership in strange ways, see the --private-users parameter to systemd-nspawn). With the image ready, first set PrivateUsers to false in the nspawn file and configure the directories you want mounted:
cat << EOF | sudo tee /etc/systemd/nspawn/ubuntu-20.04.nspawn
[Exec]
PrivateUsers=false

[Files]
# Single-parameter binds this directory name in the host as the same name in the container
Bind=/src
# Two parameters are source-in-host:destination-in-container
Bind=/home/my/sources-dir:/src
EOF
Next, as the user you will typically use or want to own the bound directories (from host to container), do this to create a container user with the same name, ID and group:
# Setup group and user in the container matching your current user's info.C_UID=$(id -u)C_GID=$(id -g)C_GROUP=$(id -gn)C_USER=$(id -un)# --console=pipe is needed so the command doesn't open a tty into the container,# which in turn is needed so both these commands can be given one after the other (otherwise,# the tty eats the second command)sudo systemd-nspawn --console=pipe -D /var/lib/machines/ubuntu-20.04 groupadd -g $C_GID$C_GROUPsudo systemd-nspawn --console=pipe -D /var/lib/machines/ubuntu-20.04 useradd -g $C_GROUP -G sudo -u $C_UID -s $SHELL -m $C_USER# TODO: Setup sudo like this and install some key packages (sudo?)%sudo ALL=(ALL) NOPASSWD:ALL
# TO DO: Replicate SSH key setup# TO DO: Replicate bind mounting home?# TO DO: Replicate adding specific mounts?# TO DO: Make the config script idempotent?
Once the user is created and binds are configured, the container can be started with machinectl start ubuntu-20.04 and the Bind-provided directories should be in place and accessible.
If things are owned by nobody/nogroup in the container, it probably means the PrivateUsers option is set to non-false, this will perform username mapping and gets tricky if you want read-write access to files.
Keep in mind that using the same UID/GID namespace is somewhat insecure, so it’s best to use it only for workloads you mostly trust or for local development. systemd-nspawn has safer options using --private-users but those are mostly incompatible with writable Bind directories, so I won’t discuss them here. Also keep in mind that systemd-nspawn is pretty spartan in its user mapping and volume management/permissions capabilities, so if you need something more elaborate you will probably be better off using LXC instead.
Configuration
Most of the interesting config options supported by systemd-nspawn can be invoked more directly using that command, instead of machinectl; that said, most functionality is available via machinectl but it requires creating .nspawn systemd units as seen above.
Other references
I pieced together this tutorial from resources found in the following sites:
I also had to read the man pages for systemd-nspawn and systemd.nspawn extensively - the first one contains more detailed documentation on how each option works, when given as command-line parameters to systemd-nspawn itself, but I found it more comfortable to configure things in an .nspawn unit file as shown above, these are documented in systemd.nspawn and always correspond to systemd-nspawn command-line options, and doing it in the unit file allows using machinectl for most day-to-day operations (starting, stopping, creating, removing, shelling into the container).
And send the whatever.b64, whatever.sig.b64, and checksums files.
The checksum files allow verification that the content didn’t get mangled, because it’s easy for it to get borked in transit and this technique doesn’t provide a lot of integrity validation like e.g. GPG would.
Then the verifier does:
Obtain the ssh key in question. I use this technique with Launchpad public keys, so this works:
In an email thread with some colleagues, one of them mentioned that they had to force their laptop to use “deep” sleep instead of “s2idle”. This got me thinking - I’ve had the impression that my XPS13 sometimes doesn’t really suspend, and/or wakes up in the middle of the night, because the battery capacity sometimes is lower than it should be after being suspended overnight (going to sleep with 100% battery and having about 70% the morning afeter).
From here it looks like indeed s2idle is not really suspend-suspend and the system can wake up of its own accord according to unclear rules (or maybe they are clear, but I don’t care, I want the system to go to full sleep and only wake up when I open the lid or something similar). And it seems the way to get it to real deep-sleep is to write “deep” into /sys/power/mem_sleep. It further mentions that indeed s2idle is the default (which I confirmed by checking the above file), but it can be overridden by setting mem_sleep_default in the kernel command line.
It’s been a while since I last had to muck with GRUB configuration…
Just for kicks I also looked up mem_sleep_default and lo and behold, came upon a thread for the XPS 13 9310 (exactly the one I have).
Inspired by some article on the Internet, I set out to modernize the way I take daily notes. Up until now I had simply been dumping date-named files in a single directory. This allows me to use standard tools such as grep for finding stuff in my notes, also referencing them by date when appropriate, preparing notes in advance by creating the file for a date in the future, and have comfortable aliases/commands to do things.
For example, mn (make note) creates or opens the notes file for the current day, while wmatrix creates or opens a weekly file with progress updates from the team, which I use to keep track of daily standup items and follow up if necessary.
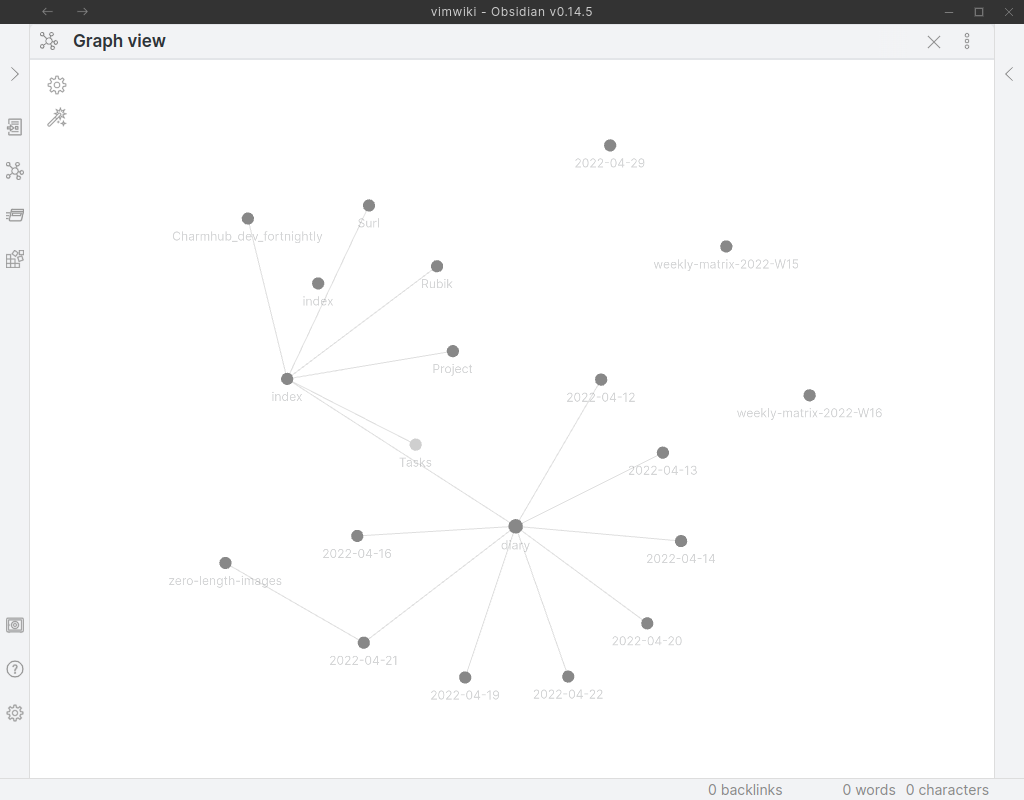
The random article in question talks about Obsidian and how it provides nice rendered Markdown notes with collapsible GUI controls, a ton of keyboard shortcuts, a modern and friendly graphical display, and it can render link relations in the notes to display a “knowledge graph”. It does all this on top of a local folder containing .md files, so it’s quite future-proof and portable, and provides mobile apps and some synchronization (which I haven’t explored) to keep notes updated.
I tried it and it felt quite heavyweight for a glorified note taker. I found the controls distracting, the general application not providing a ton of value over a single directory of files, and most importantly, the extensive keyboard navigability requires me learning another set of keybindings which at this point I’d really rather avoid.
The same random article, however, also pointed me in the direction of vimwiki. In essence, Obsidian’s knowledge base is a local wiki, and this is exactly what vimwiki provides - indeed, in the article they are identified as complementary to each other, with vimwiki providing editability and access via the command line, and Obsidian allowing remote access and a graphical view, when needed.
I configured vimwiki to use Markdown and store files next to my old notes folder:
let g:vimwiki_list = [{'path': '~/Documents/w/vimwiki',
                      \ 'syntax': 'markdown', 'ext': '.md'}]
The experience from vim is fantastic; \ww opens a wiki index, and from there any single word can become a link by hitting ENTER in command mode on top of it. Vimwiki automatically creates the target and you can start writing Markdown in it, which is nicely syntax-colored. Vimwiki automatically handles indenting and formatting of lists, tables and markdown headings, and nicely collapses and linkifies URLs. It can even manage to-do lists in brackets [ ] and indent/dedent hierarchical table entries.
Vimwiki also has the concept of “diary” entries which are automatically created under the current date’s name, as well as useful shortcuts for “yesterday” and “tomorrow” pages, and can auto-generate an index for all diary/dated entries.
Vimwiki has wiki-wide search functionality via :VWS, though of course one can still shell out and use grep in a directory of raw .md files for ultimate portability.
I updated my mn and wmatrix aliases to integrate with vimwiki and have been happily using it for the past few days. The experience is pretty close to what I had with my old raw notes folder with some niceties added on top; I’ll probably start leveraging them more as I get more familiar with the setup.