Dell XPS 13 Developer Edition – Ultrabook with Ubuntu preinstalled

Categories: English Geeky

Introduction

Dell XPS 13
Dell XPS 13 Developer Edition

In late 2010, as I was starting a new job, I bought a new laptop, a Samsung QX410, based largely on this review.

From the beginning I was quite happy with that laptop: the screen is decent, the keyboard spacious and comfortable, battery life is OK, and in retrospective it’s a solidly-built laptop that stood up to 2.5 years of heavy daily use.

However, eventually the time came for it to die, so in late 2013 I had to start looking for replacements. Since I still needed to work, I borrowed a Lenovo Thinkpad T520 to use temporarily. Spec-wise it was similar to the Samsung, save for the larger 15″ screen and the thing that really spoiled me, the excellent Lenovo laptop keyboard. Alas, this appears to have been lost in the latest generation; I had a chance to try a Thinkpad X240 (one of the candidates for replacing the Samsung) and found the island-style keyboard odd and uncomfortable.

At the same time I was able to use a Dell XPS 13 for a few days, and the keyboard on that little machine felt extremely comfortable and close to the Samsung’s (which I’m already used to). So the XPS 13 immediately moved to the top of the list. In early 2014 I finally pulled the trigger and got the Developer Edition XPS 13. The Developer Edition is the result of the “Sputnik Project” and has been available for all previous XPS 13 generations. Here are my impressions of it.

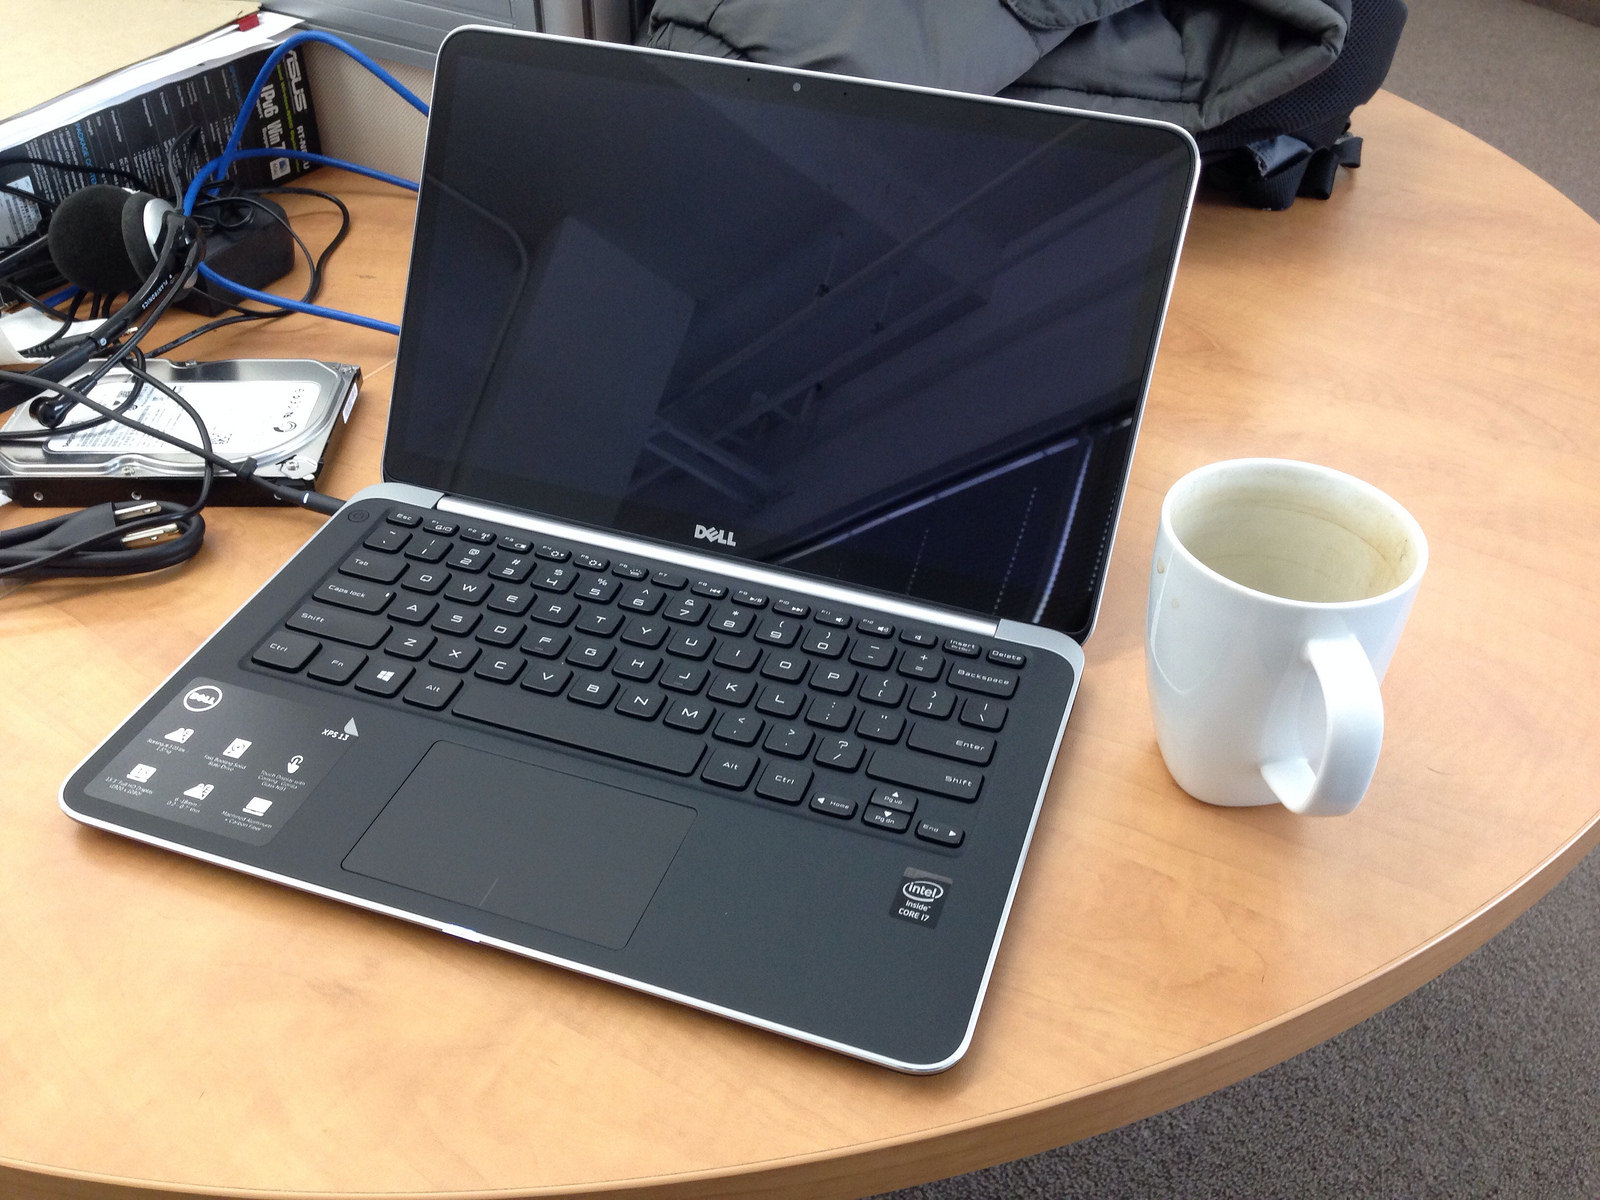
The XPS 13 is somewhat of a MacBook Air lookalike with the same slim wedgy shape. While the footprint is a bit smaller than the 13-inch Air, they look very similar from a top view. The XPS’s top lid and frame are machined aluminum, though the similarity ends there, as the keyboard and deck are coated with black soft-touch rubber, and the bottom is black carbon fiber. The XPS is different enough to qualify as “inspired by”, rather than “knockoff of”.

Incidentally, the MacBook air was also on my list of candidate laptops. The XPS 13 beat it for a couple of reasons. The screen is higher-resolution and touch-enabled, it’s Ubuntu-certified and available with Ubuntu preinstalled, and it has a PC keyboard. Apple keyboards are great but I just can’t get used to the ctrl-alt-cmd layout and always keep hitting the wrong keys. Also, for a comparable configuration, cost was similar. So in the end the XPS 13 won.

Chassis

The XPS 13 is really thin, as befits a 13-inch ultrabook, and has the typical front taper to a 6-mm thinness.

XPS
XPS

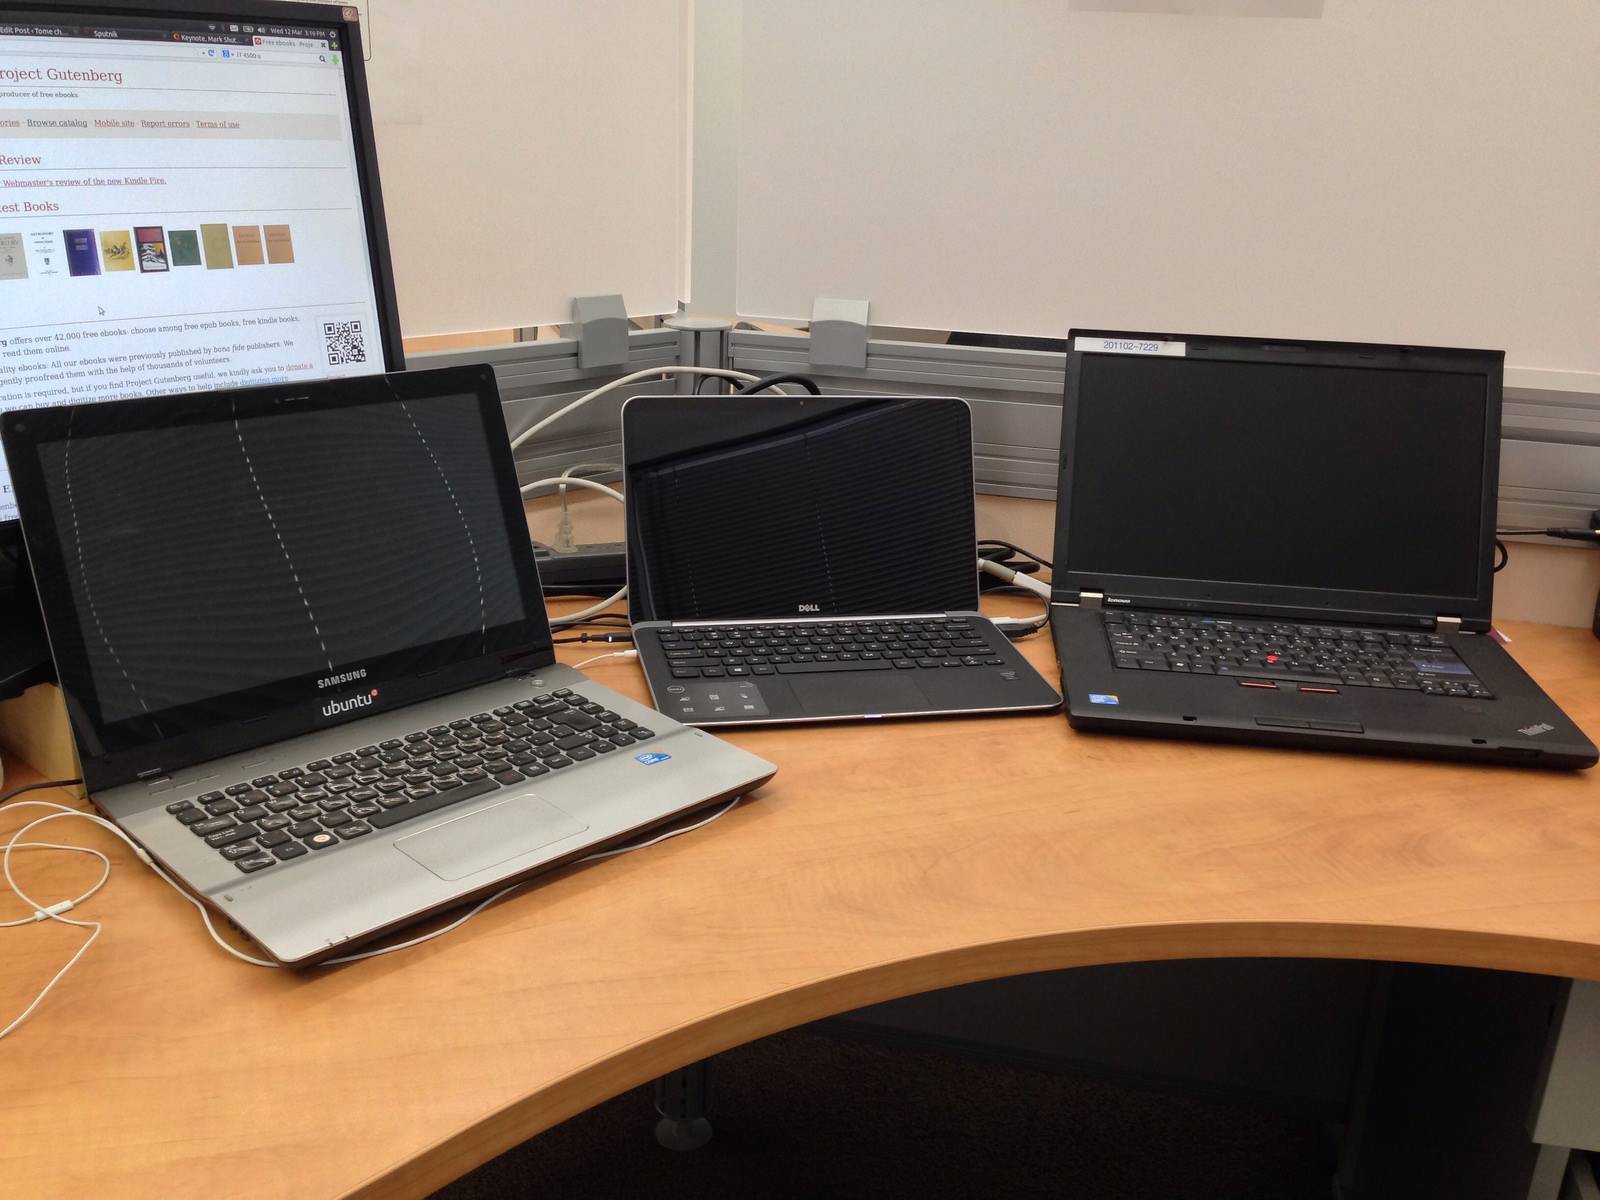
The thing weighs about 1.4 kg. Since it’s so tiny it actually feels heavy for the size, but it’s by no means heavy. Carry it in a backpack and you’ll barely feel it’s there. Quite a difference from the 2.25-kg Samsung and the 2.5-kg Thinkpad T520, which looks and feels like a behemoth next to the XPS (A nostalgia shot of those laptops next to the XPS is at the end of this post).

To give an idea of the XPS’s dimensions I made a quick photo shoot next to some comparable pre-ultrabook ultraportables.

Ultraportables
Portable gang

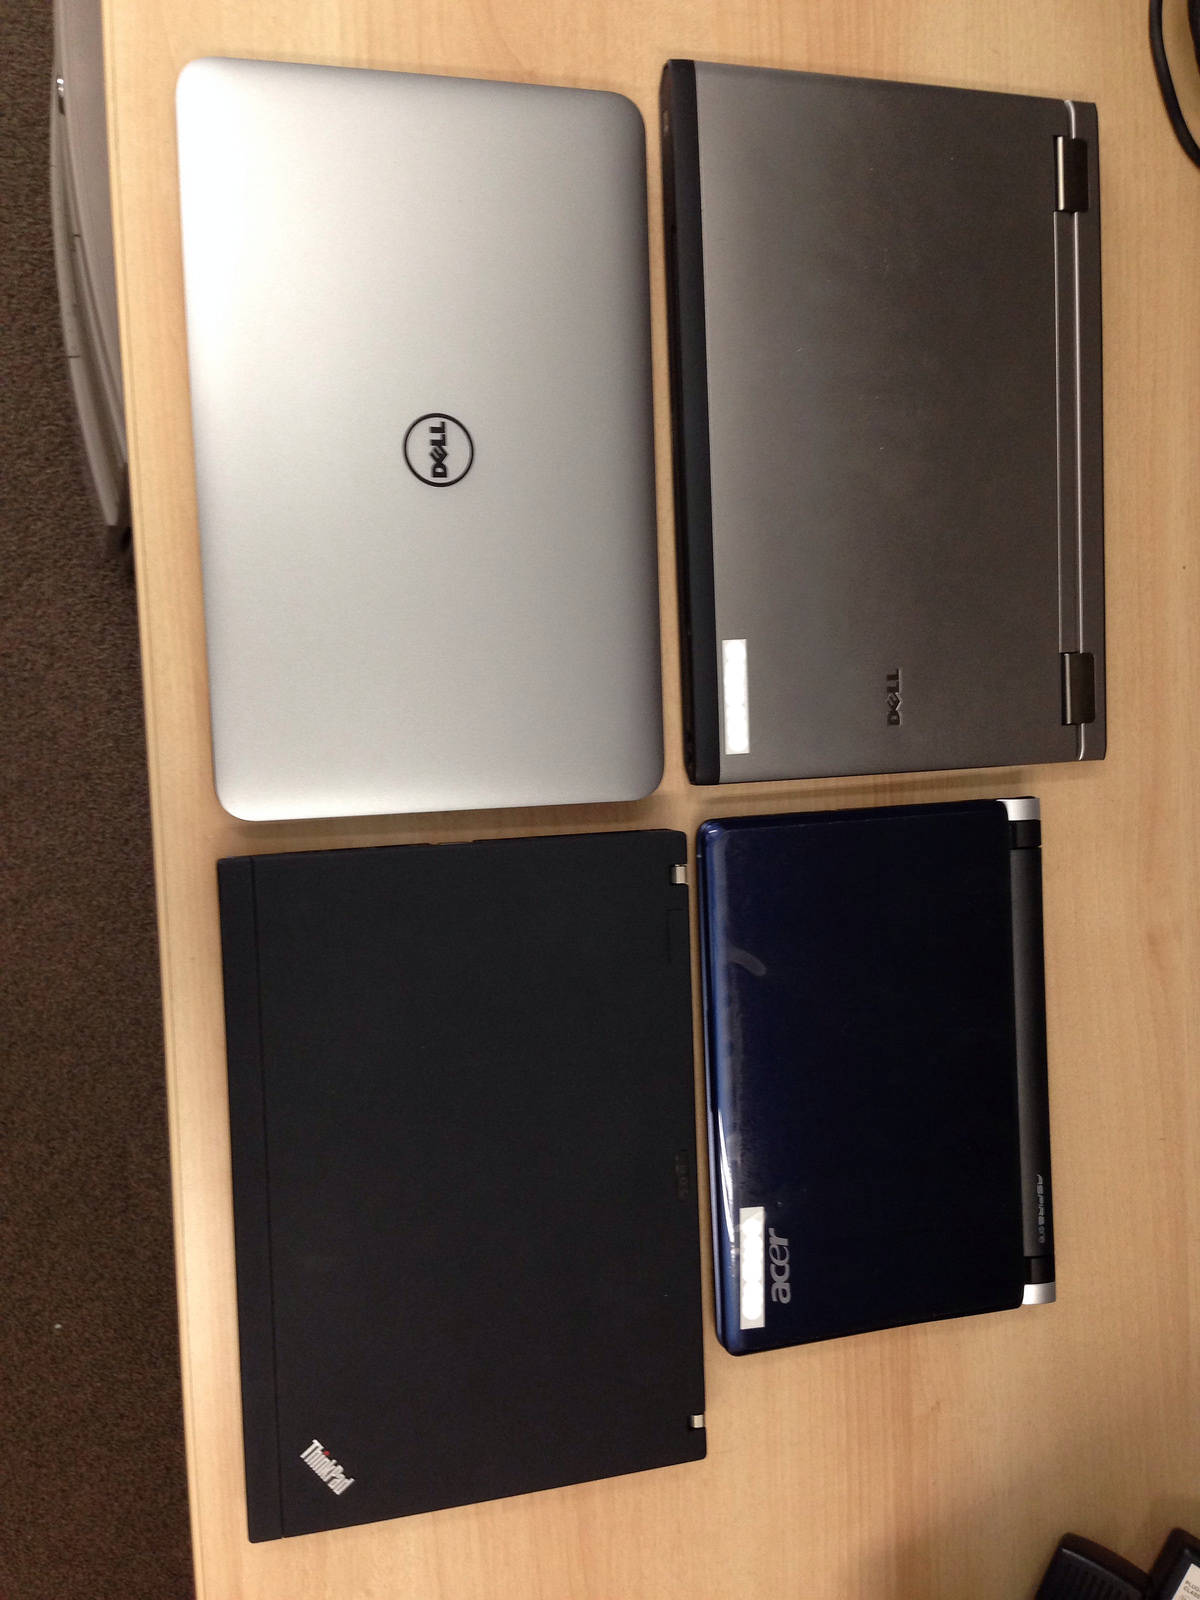
Top row shows a Dell Vostro V13 and an Acer Aspire One netbook (11″ screen). Bottom row includes the XPS 13 and the legendary Thinkpad X201 with 12″ screen. Despite having a 13″ screen, the XPS is smaller than the Thinkpad X201 and the V13. Footprint-wise, the screen is the limiting factor, so for a 13″-class system it’s reasonable to not see a huge difference.

The side view is where the XPS 13’s thinness becomes evident. The XPS 13 is on top, above the X201 and with the V13 at the very bottom.

Razor thin

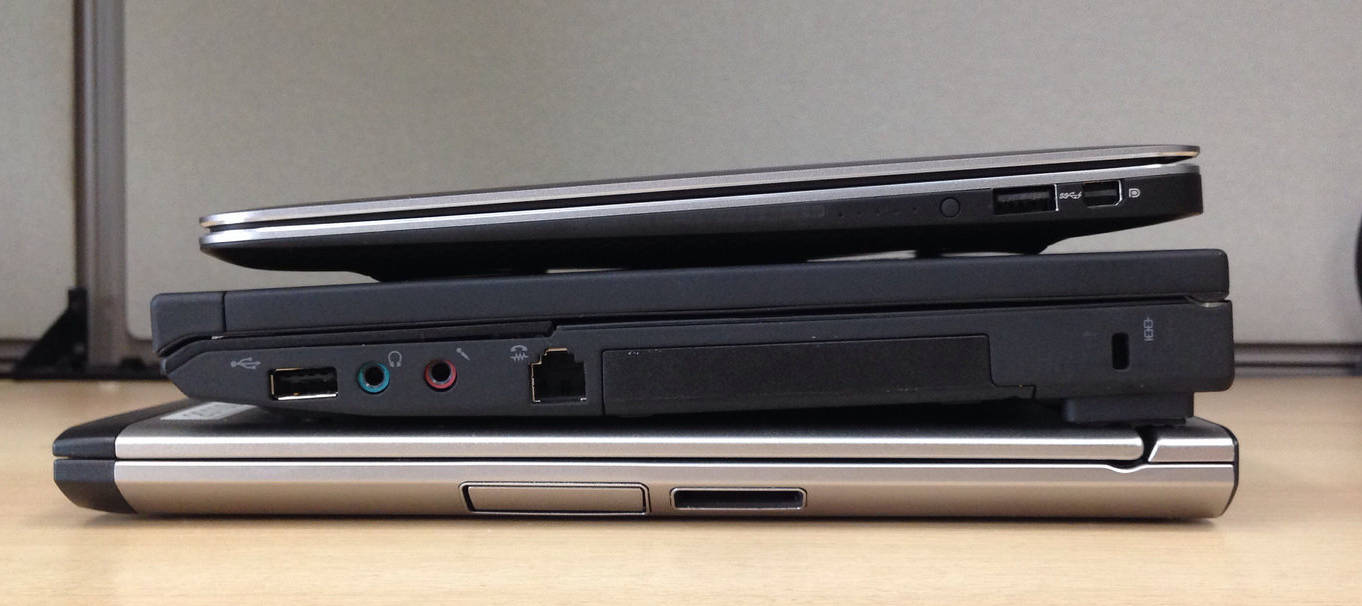
The V13 was a tremendously thin machine for its generation, which shows in the fact that it’s almost as thin as the XPS 13’s rear. Of course, the XPS 13’s taper at the front is goes on to be about as thin as the V13’s screen. The V13 made performance compromises to fit in such a svelte chassis, but in all honesty the XPS 13 is also not a speed demon and also has fewer ports and expandability than other bulkier options.

The X201 isn’t even in the same league here; comparing the thickest parts (rear end) it’s almost 3 times thicker than the XPS 13. The X201 is still quite light, about 200g heavier than the X13, the chassis is incredibly sturdy (XPS 13 doesn’t feel flimsy at all but I’d hesitate to put it through the kind of abuse a Thinkpad is known to just shrug off), and it has a lot more expandability, in the form of more USB ports, an expresscard slot, a media card reader, ethernet and modem ports, and incredibly, a full VGA connector.

By comparison and list of ports, the XPS 13 only has a combo audio jack, 2 USB 3.0 ports, and a mini-DP port for external video. This is the price one pays for ultraportability…

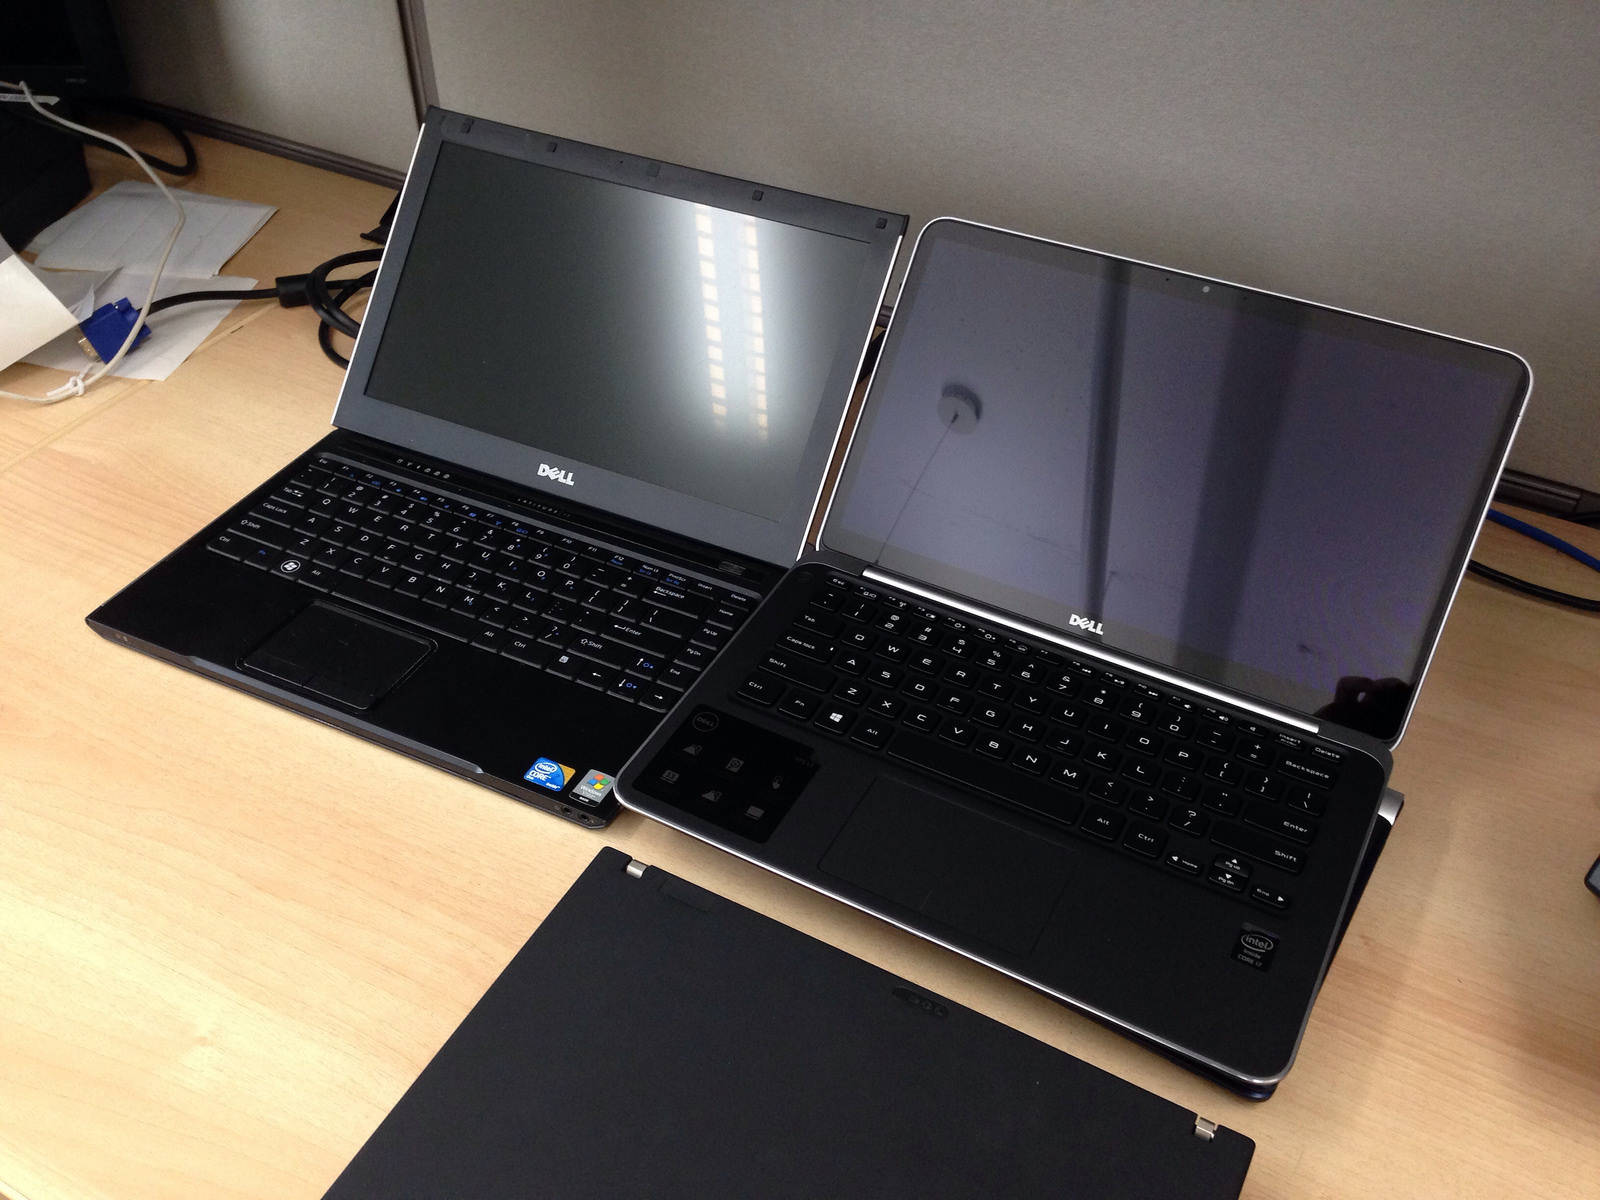
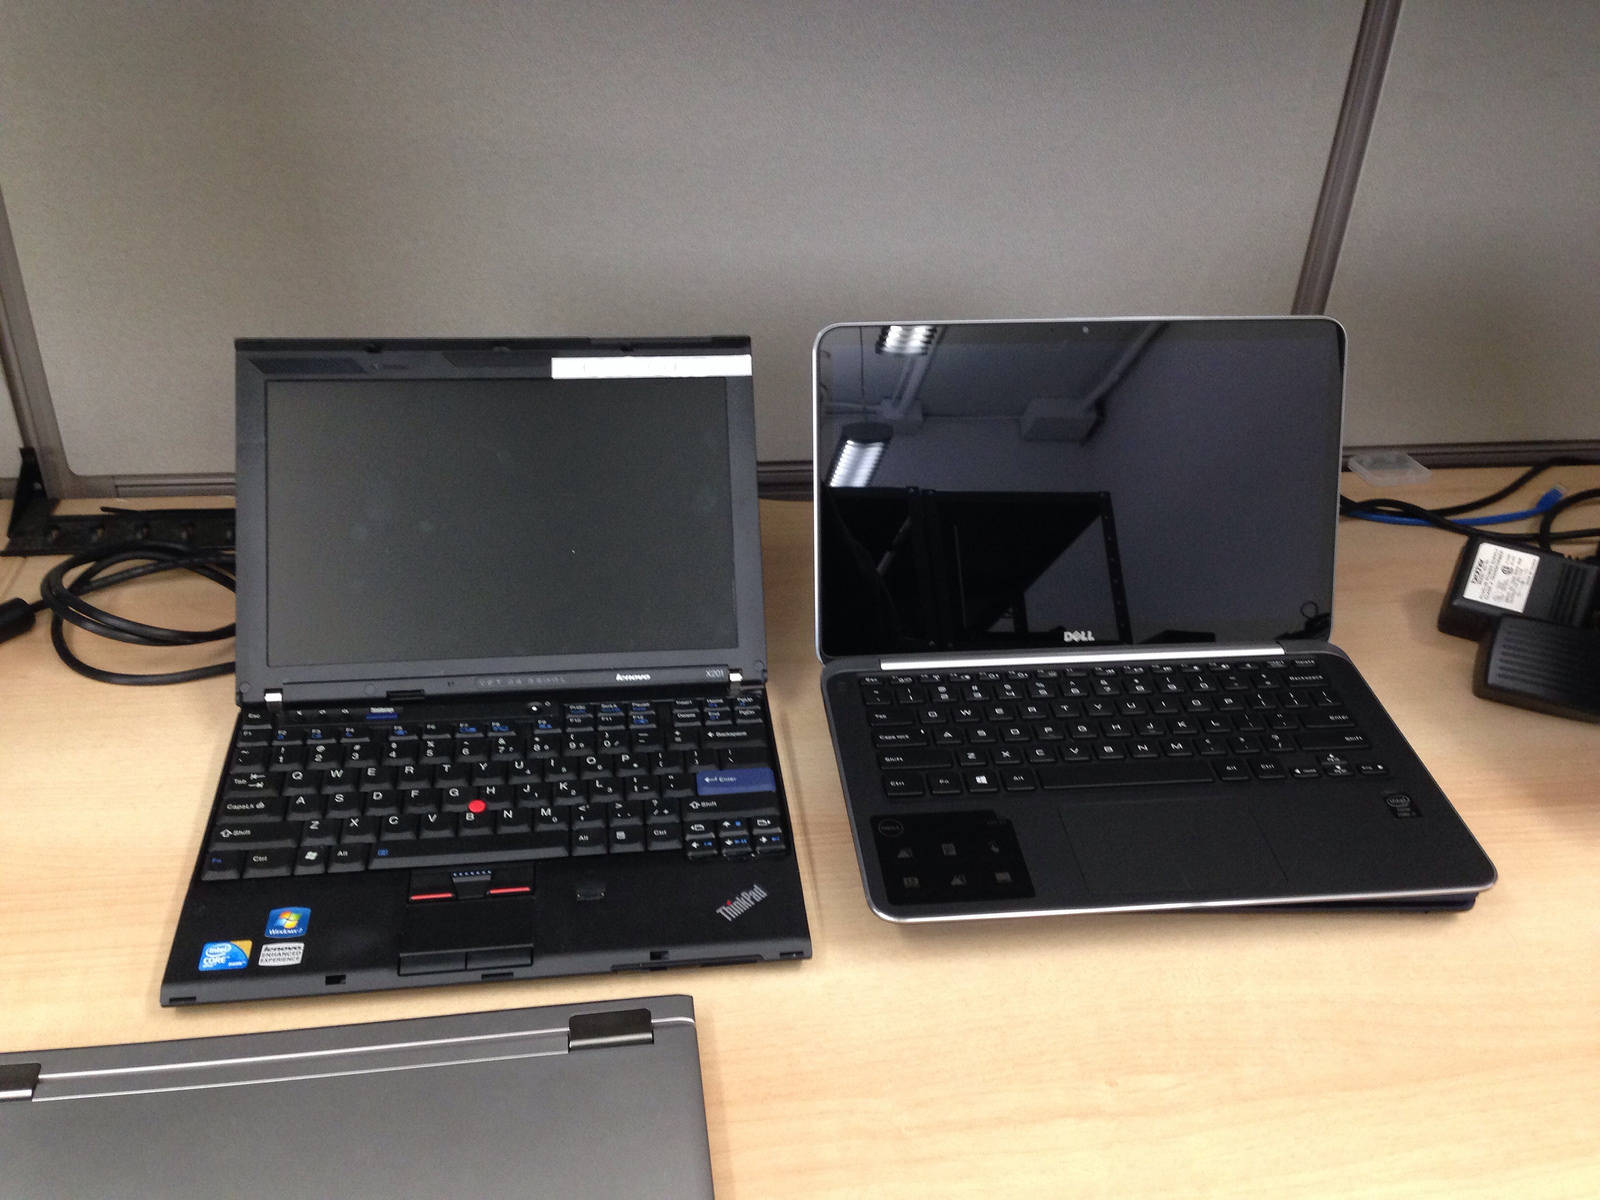
In the following paragraphs I posted pictures of the XPS 13, open, next to the V13 and the X201. The keyboard looks minimalistic in comparison but it’s quite comfortable to use. The V13’s is not as nice, while the X201 has that fantastic Lenovo keyboard.

Keyboard and touchpad

Keyboard 
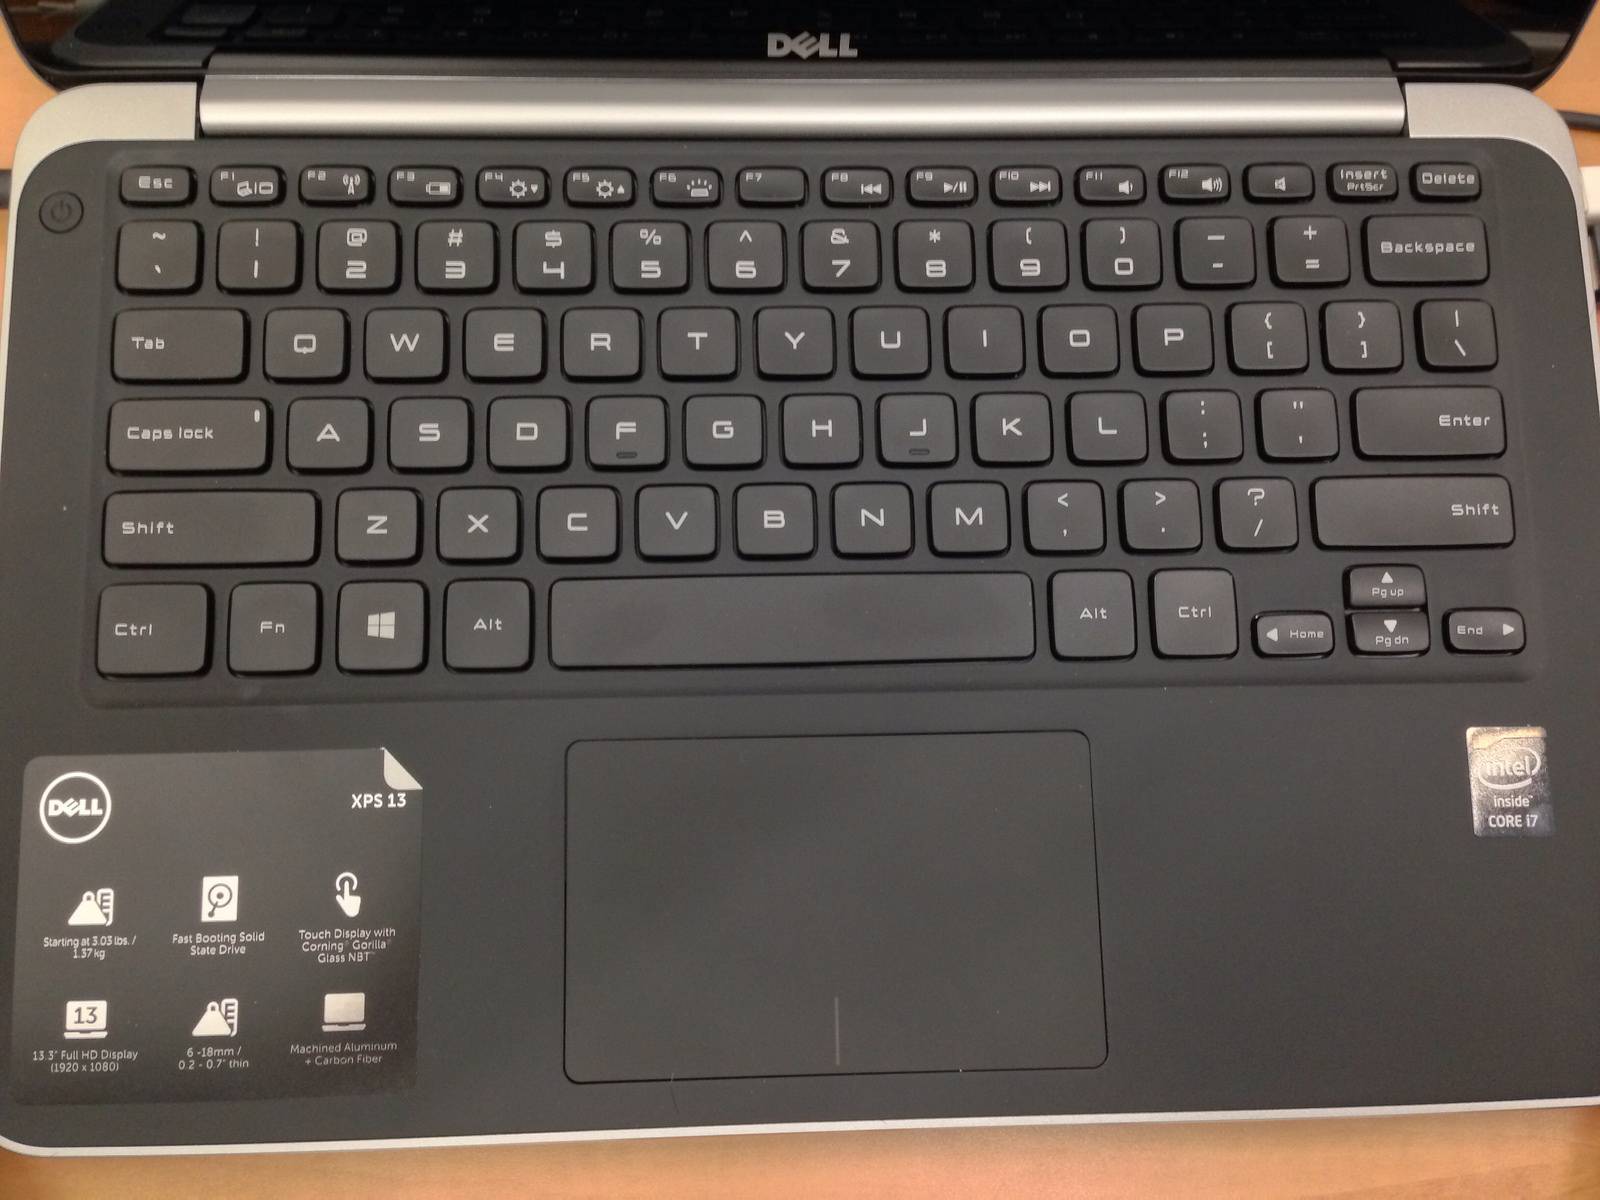
The XPS 13’s keyboard has no extraneous dedicated keys, other than the power and mute buttons; everything else is handled by the standard keys, with F-keys doubling as special-function keys to switch monitors, control wireless, show battery information, control volume and brightness as well as keyboard backlight, and perform media control functions.

All standard keys are standard-sized and in their proper positions. Exceptions are the half-size F-keys, including insert and delete, and the cursor keys. One thing I don’t like is lack of dedicated page-up and page-down keys; these are handled (along with home and end) by the cursor keys in combination with Fn. I use pg-up and pg-down extensively to switch tabs in Firefox and this is really a sore point for me. But that’s about the only tradeoff this excellent keyboard makes.

The touchpad seems to be a synaptics model, one of those “buttonless” trackpads, although it does have distinct clicklable sections at the bottom. Unlike the Samsung’s touchpad which was very troublesome and only worked in tap-to-click mode, this touchpad’s clickable buttons also work perfectly, so you’re free to click or two-finger-tap anywhere, or use the “discrete” buttons if you like, which makes things like dragging much easier.

A backlit keyboard is nice to have, but when the light is on, an annoying high-pitched whine comes from underneath the keyboard. This problem has been reported to Dell by many users and is still awaiting a fix or response. As a result, I usually keep the backlight off.

Screen

Both the laptops I’ve been using lately had non-IPS panels with industry-standard resolutions for the time. 1366×768 for the Samsung is pretty typical. One gripe I had is that the Samsung’s screen was “protected” by a glossy sheet of cheap plastic that with time became very scratched and made the screen harder to see. This can be seen in the picture at the end of this post.

The XPS 13’s screen is stunning by comparison, if only because it’s a much newer panel. Viewing angles are amazing, the 1920×1080 resolution is razor-sharp and crisp (and even a bit too high for the screen size), and the backlight is strong enough to overcome the gorilla glass cover’s gloss. At least I expect it won’t get scratched easily. This is a Synaptics touchscreen which has worked very well with Ubuntu, although I haven’t used it all that much because it feels very alien to my workflow.

Performance and battery life

I’m ill-equipped to provide an assessment here, as the jump from the pre-Sandy Bridge Samsung to the Haswell XPS 13 (plus a bump from i5 to i7 CPU) is so enormous that this machine just feels like it flies. One thing worth mentioning is that, while the Samsung had a standard mobile CPU (i5 480M with 3M cache and 35W TDP), the XPS 13 has the aforementioned, newer i7 with 4 MB cache, but in a low-TDP (only 15W), ULV variant. So by its ultraportable nature it’s on the lower side of the specs spectrum, however the generational advantage plus i7-ness really do make a difference and the system is snappy at all times.

Perhaps the biggest leap forward is the LiteOn SSD. While not hooked up directly to PCIe like a MacBook’s, this mSATA drive is absurdly fast in comparison to what I’d been using, resulting in a 3-second boot time (even with disk encryption), way faster than the 20-30 seconds I was getting on the Samsung.

Under moderate load (a few terminal windows open where I’m typing stuff, plus a browser with a some tabs, one of which is playing a Youtube video), the XPS 13 reports a battery lifetime of about 6 hours. For comparison, the Samsung lasted about 3 hours with a comparable workload on a 66Wh battery.

Given a mostly-idle workload (browser with static content plus a few terminal windows), the XPS 13 reports about 8 hours of battery life.

Software

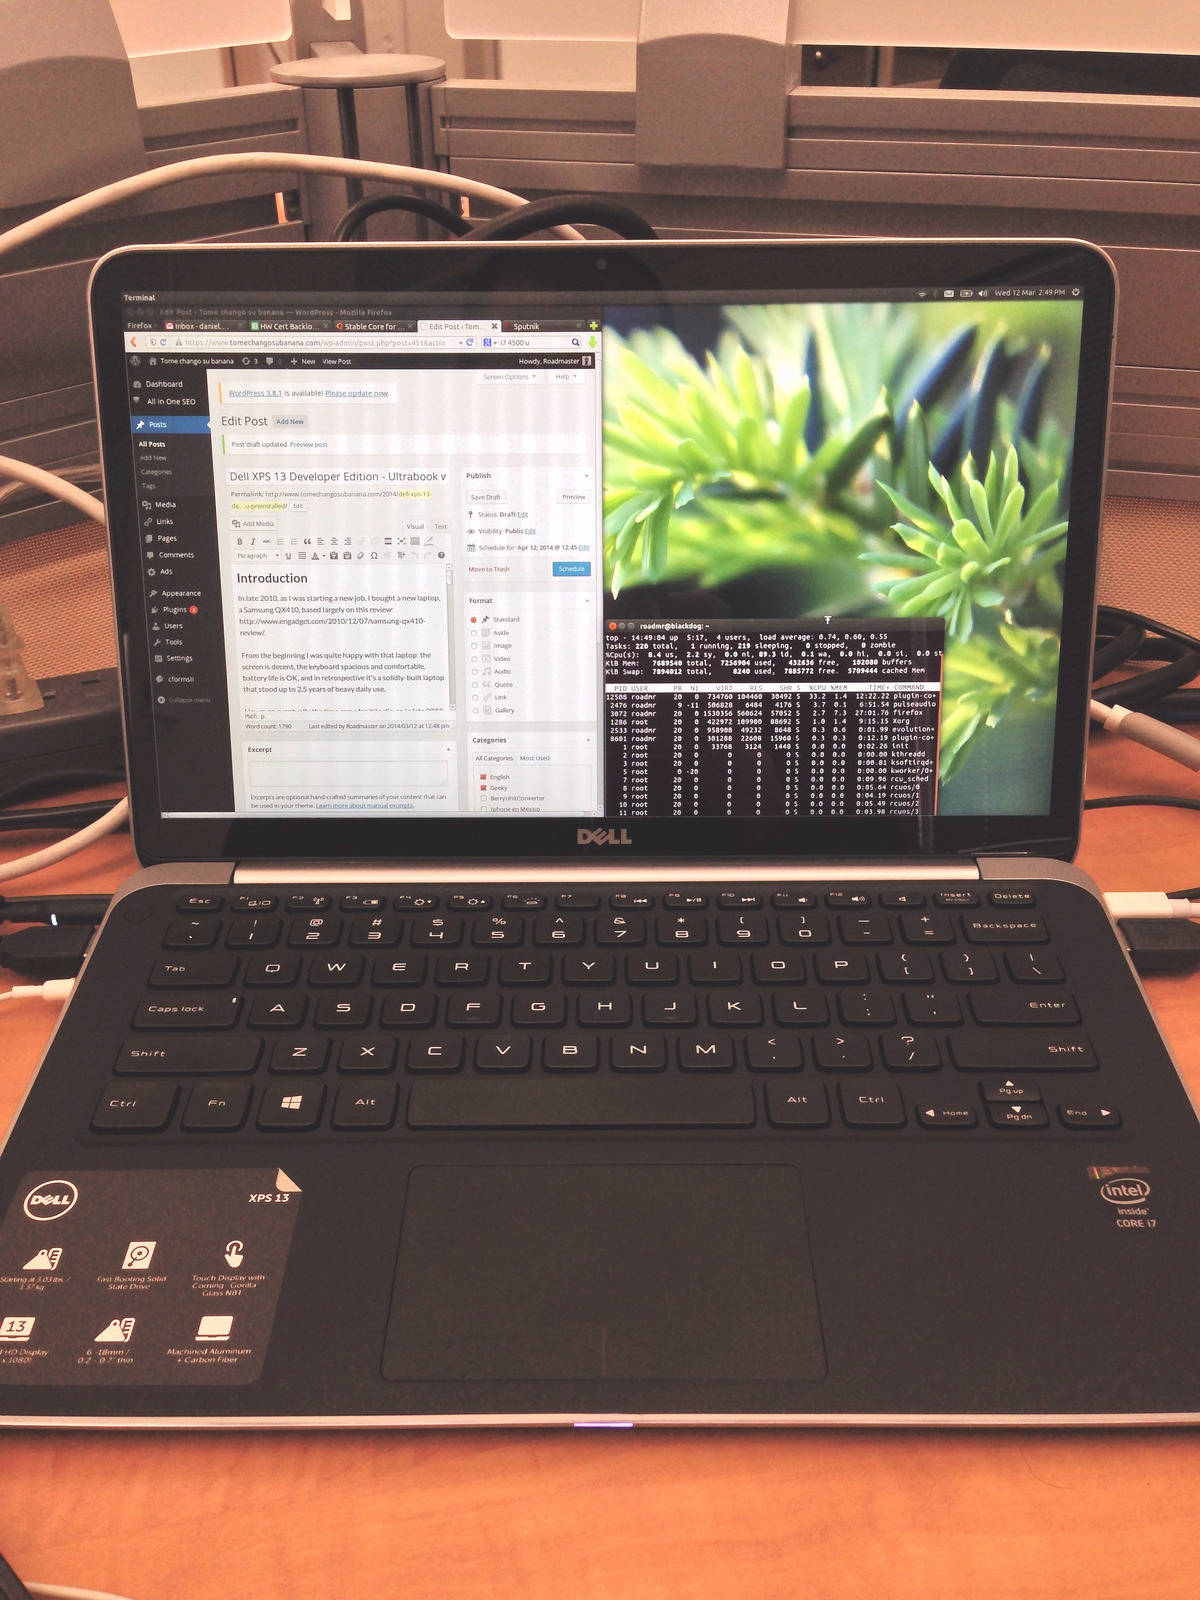
Perhaps the nicest thing about the XPS 13 is that it’s certified for Ubuntu, and the Developer Edition I got comes preinstalled with Ubuntu 12.04, augmented by some OEM-specific tweaks to ensure all the hardware works correctly. Indeed everything works out of the box, and the first-boot experience is very smooth and polished, definitely less cumbersome than booting a Windows machine for the first time.

In case it’s needed, a utility to create a recovery disk is provided. I created a USB stick which can be used to quickly restore the machine to factory status. I then proceeded to erase the preinstalled Ubuntu version and install the latest development release (which will be released as Ubuntu 14.04). Don’t get me wrong, the preinstall is perfectly usable for 99% of people as it has a typical Ubuntu installation with all the usual tools, receives security and browser upgrades until 2017, and even includes a plethora of cloud software development tools such as Juju and Virtualbox (this is why it’s called a “Developer edition” and is focused on cloud development). However, because of my work, I really wanted to have the newest possible Ubuntu version. An ulterior motive was to verify whether the OEM-specific tweaks in the preinstalled version were “upstreamed” and made available in subsequent Ubuntu versions. This is a policy for the Ubuntu certification program; whenever possible, the work done when enabling a new machine is made available in the following stock Ubuntu release.

With a couple of exceptions, everything continued to work just as it did with the preinstalled version, and I was able to recreate a working environment complete with a transfer of my backup in only a few minutes. The fast SSD and USB3.0 transfers from my backup drive are partly to thank for this.

As exceptions, the touchpad didn’t get recognized and required blacklisting an i2c-hid module; and I lost the media control keys (which I seldom use, so I haven’t bothered to re-enable them).

This makes it a great alternative for regions where the Developer Edition is unavailable; just procure the Windows version of this laptop and installing the latest Ubuntu will result in a working system.

The machines.
Left to right: Samsung QX410, Dell XPS 13 driving the external monitor on the left, Lenovo Thinkpad T520

Here’s a  quick overview of the things I didn’t like about the XPS 13. Of course, none of them were deal-breakers for me, but I wanted to sum them up to highlight the fact that yes, it’s not a perfect machine.

  • Whining electrical noise (a defect, so once Dell confirms this is fixable I’ll apply for warranty service).
  • Lack of dedicated pgup/pgdn keys.
  • Screen a bit too glossy.
  • a dearth of ports.
  • Screen resolution too high for my poor, tired eyes (I’m half-kidding with this one).

To sum up, despite the above, I very highly recommend the XPS 13 Developer Edition. In addition to the sleek and solid hardware, you get Ubuntu preinstalled which will cover 99% of people’s needs, a system which benefits from the upstreamed enablement work resulting in an excellent platform to run the latest Ubuntu, *and* you send the message that Ubuntu preinstalls are desired by users, all while freeing yourself from the Microsoft tax which has plagued Linux laptop users for so long.

Markdown

Categories: Uncategorized

Projects on github will show a README or README.md file directly on the project page. This is a good place to give some introduction or quick instructions for your project. This supports Markdown, which allows you to craft a README that will both be readable when seen in plain text, and will render nicely when seen directly in github.

Here’s a handy Markdown syntax reference and tutorial. Also, at some point I needed clarification on how to make nested lists, which I found in StackOverflow. There’s a wealth of Markdown-related information on the web!

Two useful tidbits. To render a markdown document to HTML, for previewing so you don’t have to upload stuff to github just to see what your README will look like,

apt-get install  python-markdown

and then run

markdown_py

on your README.md.

Also, vim supports markdown and will do its best to help you, but one unhelpful thing is its insistence to render underscores (_) in inverted text (as it assumes it’s the beginning of an underlined section). Just a warning 🙂

ifconfig.me – Programmatically-usable external IP finder

Categories: English Geeky

You’re probably familiar with whatismyip services. One problem with these is that they wrap the IP data in a visually-pleasing but impossible to parse smorgasboard of HTML.

I needed to determine external IP for a text-only host with somewhat limited tools, and I came across the wonderful ifconfig.me page. This basically does the same as whatismyip but with lightweight and easily parsable output. This, for instance, returns *only* the system’s external or public IP address:

curl http://ifconfig.me/ip

Several endpoints are provided for you to poke at your connection’s externally-visible information. For the ultimate in parsability and machine-readability, a complete json dump is provided here: http://ifconfig.me/all.json.

Recently I’ve had better success with http://ifconfig.co which works mostly similarly to ifconfig.me but is a bit faster.

Recording terminal sessions – script and friends

Categories: Uncategorized

Most of us have wanted, at some time or another, to share an entire “session” on the terminal. I mean showing a log of the commands we typed, their output, and so on, to illustrate a procedure or clarify a concept.

The “script” command has long been a tool of choice for this. To use it, just type:

script

this will seem to start a new shell process and start recording everything you type and everything that other commands output in response. To stop recording, just type “exit”. A file called typescript will be created with your session. If you want, you can call script with a parameter (script your-file.log) to log to that file instead.

A newer implementation of the concept is ttyrec. It behaves mostly the same as script, but instead of producing openable text files, it logs keystrokes and timing information. You need to play these back using ttyplay, but the result is pretty amazing because you can see the keystrokes being played back as they were typed. You can also instruct ttyplay to just dump the session to a plain text file, which mimics script’s behavior.

Finally, to take this concept one step further, have a look at showterm, which does essentially the same as ttyrec but automatically saves and uploads the session to a website for you to share with people. Think of it as an interactive pastebin.

Ubuntu – Automating virtual machine installation using network preseeds

Categories: Uncategorized

Virtual machines are very useful for testing. I often use them to verify changes to software, without messing up the local environment. Due to laziness I use VirtualBox and install Ubuntu official ISOs on them, rather than something more elegant/complicated such as kvm, lxc containers or chroots. This replicates an actual desktop environment pretty closely so is ideal for reporting bugs and validating that fixes to software work as expected.

Taking a virtual machine to a point where it’s mostly usable is a bit involved. I launched the desktop ISO, did the manual install procedure, rebooted, installed the VirtualBox extensions so I could mount the host’s drives, did some group changes, rebooted again… this is getting a bit tiring!

I had a quick look at Vagrant to see if it could somehow ease the task. It’s very interesting but didn’t really work in this case, as the virtual machine still has to be set up the way I describe before being able to package and then use it. What I’m after, really, is a way to set up a VM from scratch, just by doing the installation and adding a few extra packages.

This is what preseeding does, but up until now I had only played with local preseeds, baked into the ISO image. I imagined being able to load a preseed from the network would be difficult to set up quickly, and on a personal workstation, which is what would best fit my use case.

Turns out that virtualbox and a simple python module make this very easy. With the default configuration (NAT networking), a virtualbox VM will get an IP address through DHCP, and it will be able to reach the host’s public IP address. So as long as we configure the Ubuntu installer  correctly and have something serving that file, things are very easy. One of the parts I like about this is that experimenting with this is as easy as changing the local preseed and rebooting the VM. About the only cumbersome part is typing the kernel parameters every time, but since there’s only three of them to type/change, this is not as bad as it sounds.

  1. Put your preseed files in a directory (called, for instance, preseed.cfg).
  2. Change to this directory and run python -m SimpleHTTPServer. This starts a miniature HTTP Server on port 8000.
  3. If you like, verify that the preseed is served properly: wget http://:8000/preseed.cfg
  4. Set up the virtual machine, point it to the Ubuntu installation CD, start it.
  5. When you get the keyboard and human icon, press any key.
  6. Move to “install Ubuntu” but don’t press Enter.
  7. Press F6 to access the “advanced mode”. At this point we’re modifying the kernel command line.
  8. Go to the beginning, delete the “file=” portion.
  9. Add “auto url=http://:8000/preseed.cfg”.
  10. Replace “only-ubiquity” with “automatic-ubiquity”.
  11. Press Enter
  12. Sit back and relax while the virtual machine gets installed.

This fits the bill perfectly for me, it removes the manual steps in setting up a testing VM (which I don’t need to keep afterwards, so I can just delete it and recreate with the same procedure), allows for easy experimentation and customization, and doesn’t use a lot of strange technologies or components.

Here’s a link to a sample, basic preseed file. You can customize mainly the late_command (rather, the success_command for ubiquity) and anything else you like. The installation-guide-amd64 package has more details and sample preseed files.

Note that for server installations the kernel command line will be a bit different:

  • No need to add automatic-ubiquity.
  • You DO need to add the “auto url=blahblah” part.
  • For it to be 100% automated, you need to specify a few parameters that in debian-installer are requested *before* the preseed is loaded. Add these: debconf/priority=critical locale=en_US console-setup/ask_detect=false console-setup/layoutcode=us netcfg/choose_interface=auto
  • Note that for debian-installer, the late_command is used as opposed to the ubiquity/success_command.

Reference

Debian preseeding guide

Ubiquity automation

Video conversion for iPhone with avconv

Categories: Uncategorized

avconv replaces the venerable ffmpeg. It can be used to convert videos for the iPhone quite easily.

apt-get install avconv libavcodec-extra-53 libx264-123 x264

then run this script:

avconv -i input-file.mp4 \
    -vcodec libx264 -vprofile high \
    -t 30 \
    -preset slow \
    -b:v 1000k -maxrate 1000k \
    -bufsize 2000k -vf scale=1136:474 \
    -acodec libvo_aacenc -b:a 192k output_file.mp4

Another example. This uses time to calculate elapsed time, also nice and ionice to try to reduce impact on system resources. It forces downsampling to two audio channels (-ac 2), useful if the source audio stream is in e.g. 5.1 format.

time ionice -c 3 nice -20  avconv  -i whatever.avi  \
-vcodec libx264 -vprofile high -preset slow -b:v 1000k\
 -maxrate 1000k -bufsize 2000k  -acodec libvo_aacenc \
-ac 2 -ab 112k output.mp4

A final example which forces a specific aspect ratio. The source video had the correct pixel dimensions but a bad aspect ratio was encoded in the original file (and was carried over to the recoded one), making it look squished.

avconv  -i input.avi  -vcodec libx264 -aspect 16:9 \
-vprofile high -preset slow -b:v 1900k -maxrate 1900k \
-bufsize 3800k  -acodec libvo_aacenc -ac 2 -ab 112k output-iphone.mp4

Vim and the X clipboard

Categories: Uncategorized

Usually when I needed to paste stuff from a text file into a GUI program (most commonly, the browser), I resorted to opening the text file in gedit and copying/pasting from there. Using the X clipboard by selecting text with the mouse kinda worked, but it’s subject to Vim’s visual representation of the text, which may include unwanted display-related breaks. So using gedit was the easiest, but also awfully kludgy solution.

I did some research and learned that vim does have direct access to the X clipboard. I tried the commands they mention (basically "+y to yank selected text, then I tried to paste in a GUI application; or "+p to paste from the current X clipboard). They didn’t work. My installed version of Vim in Ubuntu lacked the xterm_clipboard setting. I was in despair!

Then I came across this bug report in Launchpad. Upon reading it I realized that it was as simple as installing vim-gtk. I had never considered this, as it includes a graphical Vim version which I have absolutely no use for. However the bug report mentions that it also includes a text version of vim compiled with X clipboard support. So I installed, fired up Vim, and the feature works well!

I can now have a buffer with long lines, with :set wrap and :set linebreak, which would be afwul if I cut/pasted it with the mouse. I can select text using vim commands and just yank it into the + register, and it’s instantly available in the X clipboard. Bliss!

Building Debian/Ubuntu packages with sbuild

Categories: Uncategorized

Many of the on-line instructions and tutorials are quite complicated. Why? It was easy for me:

sudo apt-get install sbuild

To build a virtual machine:

mk-sbuild --distro=ubuntu --arch=i386 precise

this will create a schroot in /var/lib/schroots/precise-i386. Note how it appends the architecture to the schroot name. Also note that the first time you run mk-sbuild, it’ll show you a configuration file and configure your environment. I didn’t change anything in the config file, I used it “as it was”. When it prompts you to log out, do it, otherwise things won’t work.

OK now you want to build a package using your chroot with sbuild:

sbuild -A -d precise package.dsc

This will build the package on precise for ALL available architectures. Note that -d is just “precise”; the -A flag will tell sbuild to build architecture: any packages for all available architectures (so if you have amd64 and i386 chroots, it’ll do the right thing and build two packages).

If you want to build arch-specific packages:

sbuild  -d precise-i386 package.dsc

This will magically build for the given architecture (i386). Note that arch: any packages will also be built.

You can also specify the arch as a parameter (but then you have to leave it out of the -d name):

sbuild  -d precise --arch=i386 package.dsc

This will not work:

sbuild  -d precise-i386 --arch=i386 package.dsc

Using diff on the output of two commands – named pipe and bash magic

Categories: Uncategorized

Ever wanted to diff the output of two commands? Usually it’s done by first piping each command to a temporary file and then diffing them.

The following syntax creates a named pipe for the command and uses the pipe’s name instead of a filename. Bash takes care of everything automagically so all you have to do is:

sort <(cat /etc/passwd)

That’s a dumb example, but how about this?

diff <(command1) <(command2)

The commands can be as complicated as you need them to be!